Execute Test Runs using Quick Run
The Quick Run option is an efficient way to record essential information about the execution of a Test Run without needing to fill in additional details. Using the Quick Run option, you can:
-
Enter the planned time and actual time
-
Update the status, such as passed or failed
-
Submit Defects, as needed
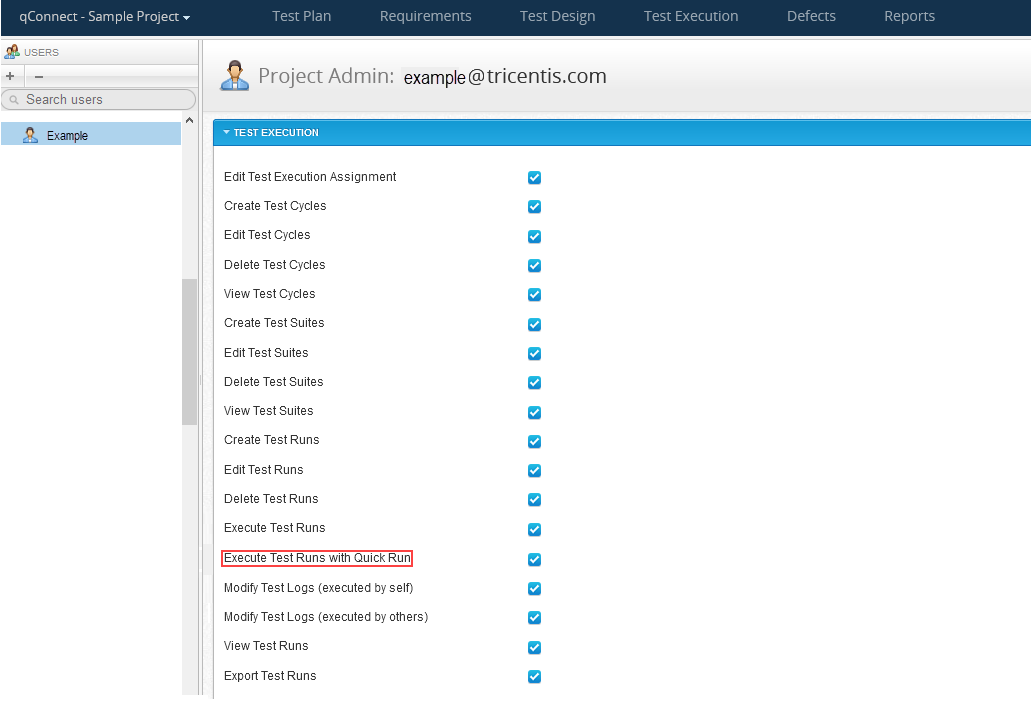
Testers need the Execute Test Runs with Quick Run permission setting in order to use this feature. If disabled, Quick Run cannot be used. Admins can enable the permission by clicking the Gear icon and selecting User Management from the drop-down menu. In the Text Execution section, select the check box next to Execute Test Runs with Quick Run permission to activate or deactivate the setting.
Execute a single Test Run using Quick Run
-
Click the Test Execution tab.
-
In the tree panel, select the object that contains the Test Run that you want to execute, such as a Release or a Test Cycle.
The object screen appears.
-
Click the Statistics tab to view a grid of all Test Runs contained in the object.
-
Click the link in the ID column for the Test Run that you want to execute.
The Test Run screen appears.
-
Click Quick Run.
If the most recent version of a selected Test Case has not been approved, the Execute Approved Test Case modal appears. Proceed to step 6.
If the most recent versions of all selected Test Cases have been approved, the Test Run Quick Run dialog appears. Proceed to step 8.
-
On the Execute Approved Test Case modal, select the option button for the most recent version of the Test Case.
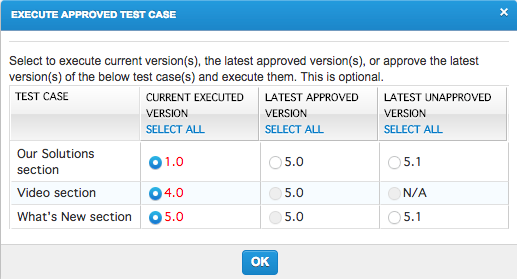 You must have the appropriate permissions to approve Test Cases. If you do not have the correct permissions, you can only execute the most recently approved version, which may be outdated.
 -
Click OK.
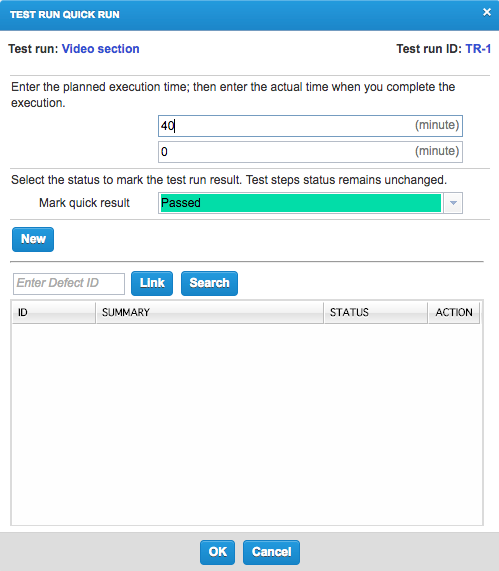
The Test Run Quick Run dialog appears.
-
Complete the following on the Test Run Quick Run dialog, as needed.
-
In the Planned Time field or the Actual Time field, enter the planned or actual execution time, respectively.
-
In the Mark quick result field, select the status of the Test Run.
-
In the unlabeled Defect ID field, enter a Defect ID to link a Defect to the Test Run. Click Link to add the Defect to the Defect grid.
or
Click New to create a new Defect. The Defect Submission screen appears, where you can enter and save details for a new Defect.
-
-
Click OK to save the execution information.
Execute multiple Test Runs using Quick Run
-
Click the Test Execution tab.
-
In the tree panel, select the object that contains the Test Runs that you want to execute, such as a Release or a Test Cycle.
The object screen appears.
-
Click the Statistics tab to view a grid of all Test Runs contained in the object.
-
Select the check boxes for the Test Runs that you want to execute.
-
Click Quick Run.
If the most recent version of a selected Test Case has not been approved, the Execute Approved Test Case modal appears. Proceed to step 6.
If the most recent versions of all selected Test Cases have been approved, the Test Suite Quick Run dialog appears. Proceed to step 8.
-
On the Execute Approved Test Case modal, select the option button for the most recent version of the Test Case.
You must have the appropriate permissions to approve Test Cases. If you do not have the correct permissions, you can only execute the most recently approved version, which may be outdated. -
Click OK.
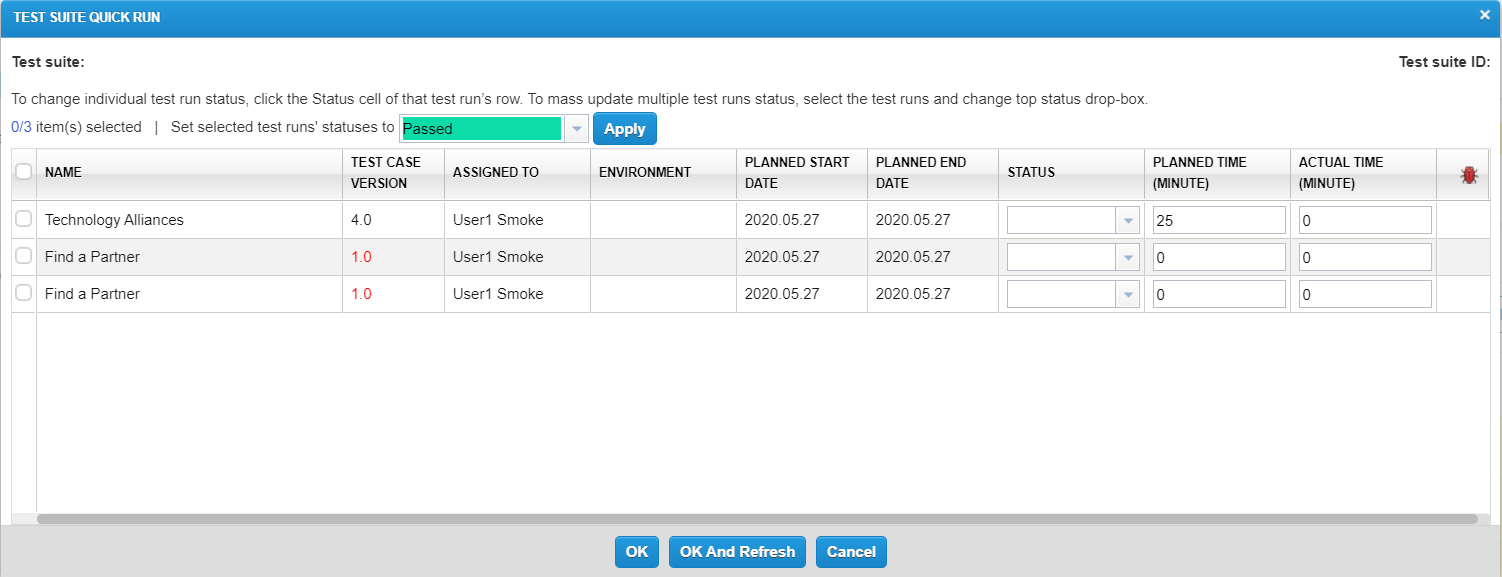
The Test Suite Quick Run dialog appears.
-
In the Status field for each Test Run, select the appropriate status.
To apply the same status to all listed Test Runs, you can select all check boxes, select the status at the top of the grid, and then click Apply. -
(Optional) In the Planned Time (Minute) field or the Actual Time (Minute) field, enter the planned or actual execution time, respectively.
-
Click OK And Refresh to save the information and refresh the object screen.