Buffer Module Attributes
To add and buffer Module Attributes for the elements of a message in Tosca Commander, follow the steps below:
-
Select one or more of the following elements:
-
an OSV Module
-
a Module folder that contains OSV Modules
-
a ComponentFolder that contains OSV Modules and Scenarios
-
-
Access the OSV menu.
-
Click Buffer in the OSV menu. This opens the Attribute Assistant window.
-
The Attribute Assistant window displays the following columns:
-
Module Attribute lists all Module Attributes that you can add for the selected elements
-
Values indicates the value of the Module Attribute
-
# Modules indicates in how many Modules the system creates the Module Attribute
-
Variation indicates how many different values the system can find for the Module Attribute
-
Direction indicates if the related message is outbound or inbound
-
Type indicates the type of Module Attribute, e.g. Status Code
-
Path an XPath or JPath expression links the Module Attribute to the XML or JSON element in the payload. You can find the relevant XPath or JPath expressions in the Properties pane under the parameter Path.
-
-
To add and buffer a Module Attribute, select it and click Add. You can select multiple Module Attributes by holding CTRL.
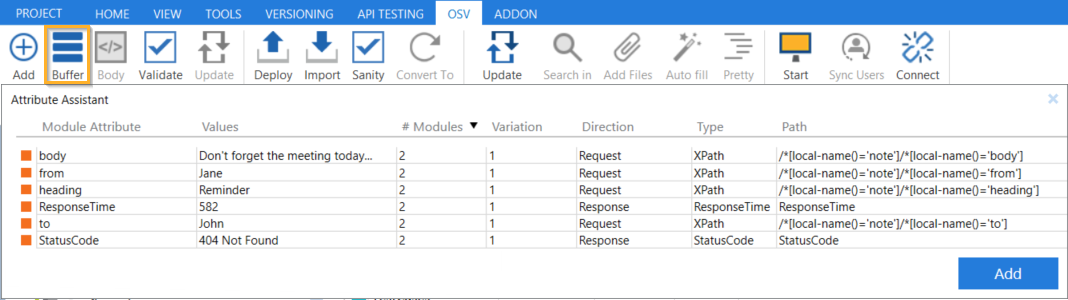
Attribute Assistant window
The system adds the buffered Module Attributes to the Modules they belong to. If you selected an element that contains both Modules and Scenarios, the system also adds the respective XTestSteps and XTestStepValues, jumps to the Scenario, and expands the TestSteps.

Buffered Module Attributes
To jump from a Module Attribute in the Attribute Assistant window to the corresponding Module, right-click it and select Find Corresponding Modules from the context menu. This triggers a TQL search at the project root element level.
Alternatively, you can add and buffer Module Attributes manually. To do so, select a Module and switch to the Technical View. Highlight an element in the payload with your mouse and click Buffer in the OSV menu.