Configure SFTP
Use the service port type SFTP to set up a Secure File Transfer Protocol (SFTP) connection. An SFTP connection allows you to access, transfer, and manage files.
Configure your service port
Once you have created your service port, you can configure the general service port details:
|
Attribute |
Description |
|---|---|
|
General - Name |
Enter the name of the service port. |
|
General - Type |
Select your service port technology. |
|
Read / Write / Read & Write |
Select what your service port should do with messages:
|
|
Real Service |
Select if you want to connect to a real service. |
|
Allow OSV to forward requests to the real service. To use this option, you need to select Real Service. |
|
|
Allow OSV to store forwarded messages in the Recorder tab. To use this option, you need to enable Forwarding. |
|
|
Active |
Select if you want your service port to be active, deselect to set it to inactive. |
To connect to SFTP, specify the following attributes:
|
Attribute |
Description |
|---|---|
|
Server Address |
Enter the address of the SFTP server. |
|
Port |
Enter the SFTP server port. |
|
Username |
Specify the user name that you use to connect to the SFTP server. |
|
Password |
Specify the password that you use to connect to the SFTP server. |
|
Proxy: Type |
Select the proxy type that your network setup requires. The available options are: None, Socks4, Socks5, and Http. |
|
Proxy: Address |
Enter the proxy address. |
|
Proxy: Port |
Enter the proxy port. |
|
Proxy: User |
Specify the user name that you use to connect to the proxy server. |
|
Proxy: Password |
Specify the password that you use to connect to the proxy server. |
|
Polling Interval (sec) |
Specify how often OSV checks if new files are available in the SFTP folders. You can specify a new polling interval in seconds. The default value is 30 seconds. |
|
Delete Processed Files |
If you enable this option, the system deletes messages from the server after processing. |
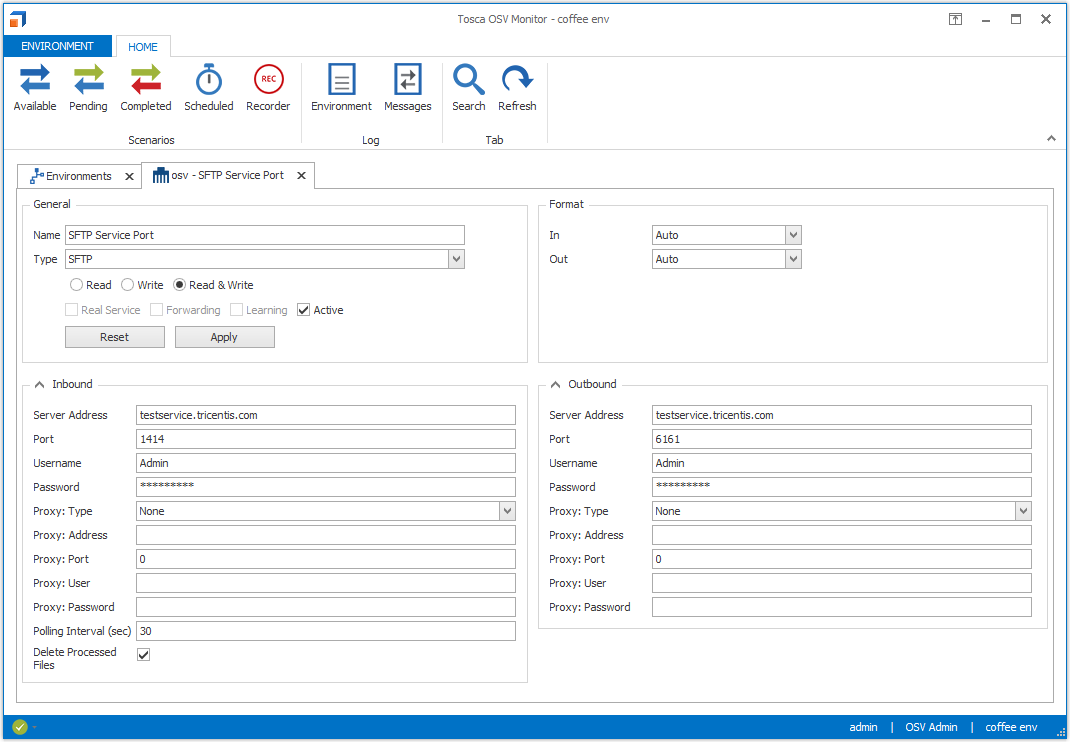
SFTP service port
To save your changes, click Apply. To discard your changes, click Reset.
You can record messages directly in the Tosca OSV Monitor.