|
|
Specify table headers
Every table has headers: header rows and/or header columns.
RPA Studio automatically assigns header rows:
-
During the scan if you scan a table in your application
-
In the Excel Modules of the RPA subset
If you want to add header columns, or if you want to specify different header rows, you need to update the Module.
If you make changes to a Module, RPA Studio automatically updates all Steps that you created from this Module. It also applies the same specifications to all Steps that you create from the Module in the future.
Define headers for scanned tables
When you scan a table, RPA Studio automatically selects headers.
During the scan, you can change them in the Content View window of the Advanced View.
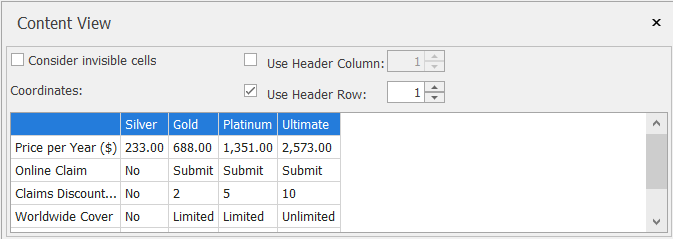
Content View window
After the scan, you can change the steering parameters HeaderColumn and/or HeaderRow in the Properties tab of the table element.
Define headers for Microsoft Excel tables
If you steer Microsoft Excel tables with the Excel Modules of the RPA subset, RPA Studio assumes that the first row is the header row.
If you also have a header column, or if you want to specify a different row as header, you need to manually update the Module with this information.
To define headers for Microsoft Excel tables, follow the steps below:
-
In the Module Excel Range Manipulation, select
 Data Table.
 -
Open the Properties pane by clicking on the white arrow on the right side of the screen.
-
Enter the respective index number for the steering parameters HeaderColumn and/or HeaderRow.
In the screenshot below, the first row and the first column are table headers:

Header properties in the Module Excel Range Manipulation