Connect to Jira Server
Connecting qTest Manager and Jira Server gives testers access to Jira information in real-time for requirements and defects and provides developers access to information about Defects, including the steps leading to the error so that developers can reproduce the Defect.
To use the integration, connect qTest Manager and Jira Server at the project level. For information about the permissions needed to set up and configure a Server connection, refer to Which Jira Permissions Are Required to Set Up a Connection?
Prerequisites for qTest SaaS + Jira Server
The following is required to establish a connection between qTest SaaS and Jira Server. If you are using qTest OnPremises and Jira Server, you will skip this section. You may need to incorporate your IT infrastructure team to help with the connection.
IP Address and Firewall Configuration
-
Verify your Jira Server's IP address is configured to be a public IP address, so your Jira instance is accessible publicly.
If your company wants to have 1 Jira URL for public communication with qTest and another URL for local access only you will need to set up a reverse proxy. -
Ask your IT department to configure your Jira Server and firewall's settings to accept accesses/requests to/from the following specific Amazon servers elastic IPs. This must be a bi-directional set up accepting inbound and outbound requests between the qTest Amazon Elastic IPs and your Jira Server.
The reason for doing this is that we have APIs to send to Jira to receive information and use other Jira APIs to be notified of changes in Jira for auto-sync of objects to qTest. Only when you allow the communication between two servers, the integration between qTest and Jira is successful.
Refer to Amazon Server Elastic IP Addresses Master List.
To establish the connection between Jira Server and qTest Manager SaaS, do the following:
-
If your Jira Server protocol is HTTP (80. 8080) or https (443), make sure you open the correct ports.
-
If you encounter an issue, refer to How do I troubleshoot my Jira connection?
-
Install the free Jira Integration: qTest Enterprise add-on from the Atlassian Marketplace.
Configure Jira Server Integration Without Using OAuth Token
-
From the qTest project, position the arrow cursor over the gear icon located in the top right area of the screen and select the Integration Settings option.
-
The Integration Settings page loads. In the External Systems section, select Jira.
-
The Configure Integration information for Jira page displays.
-
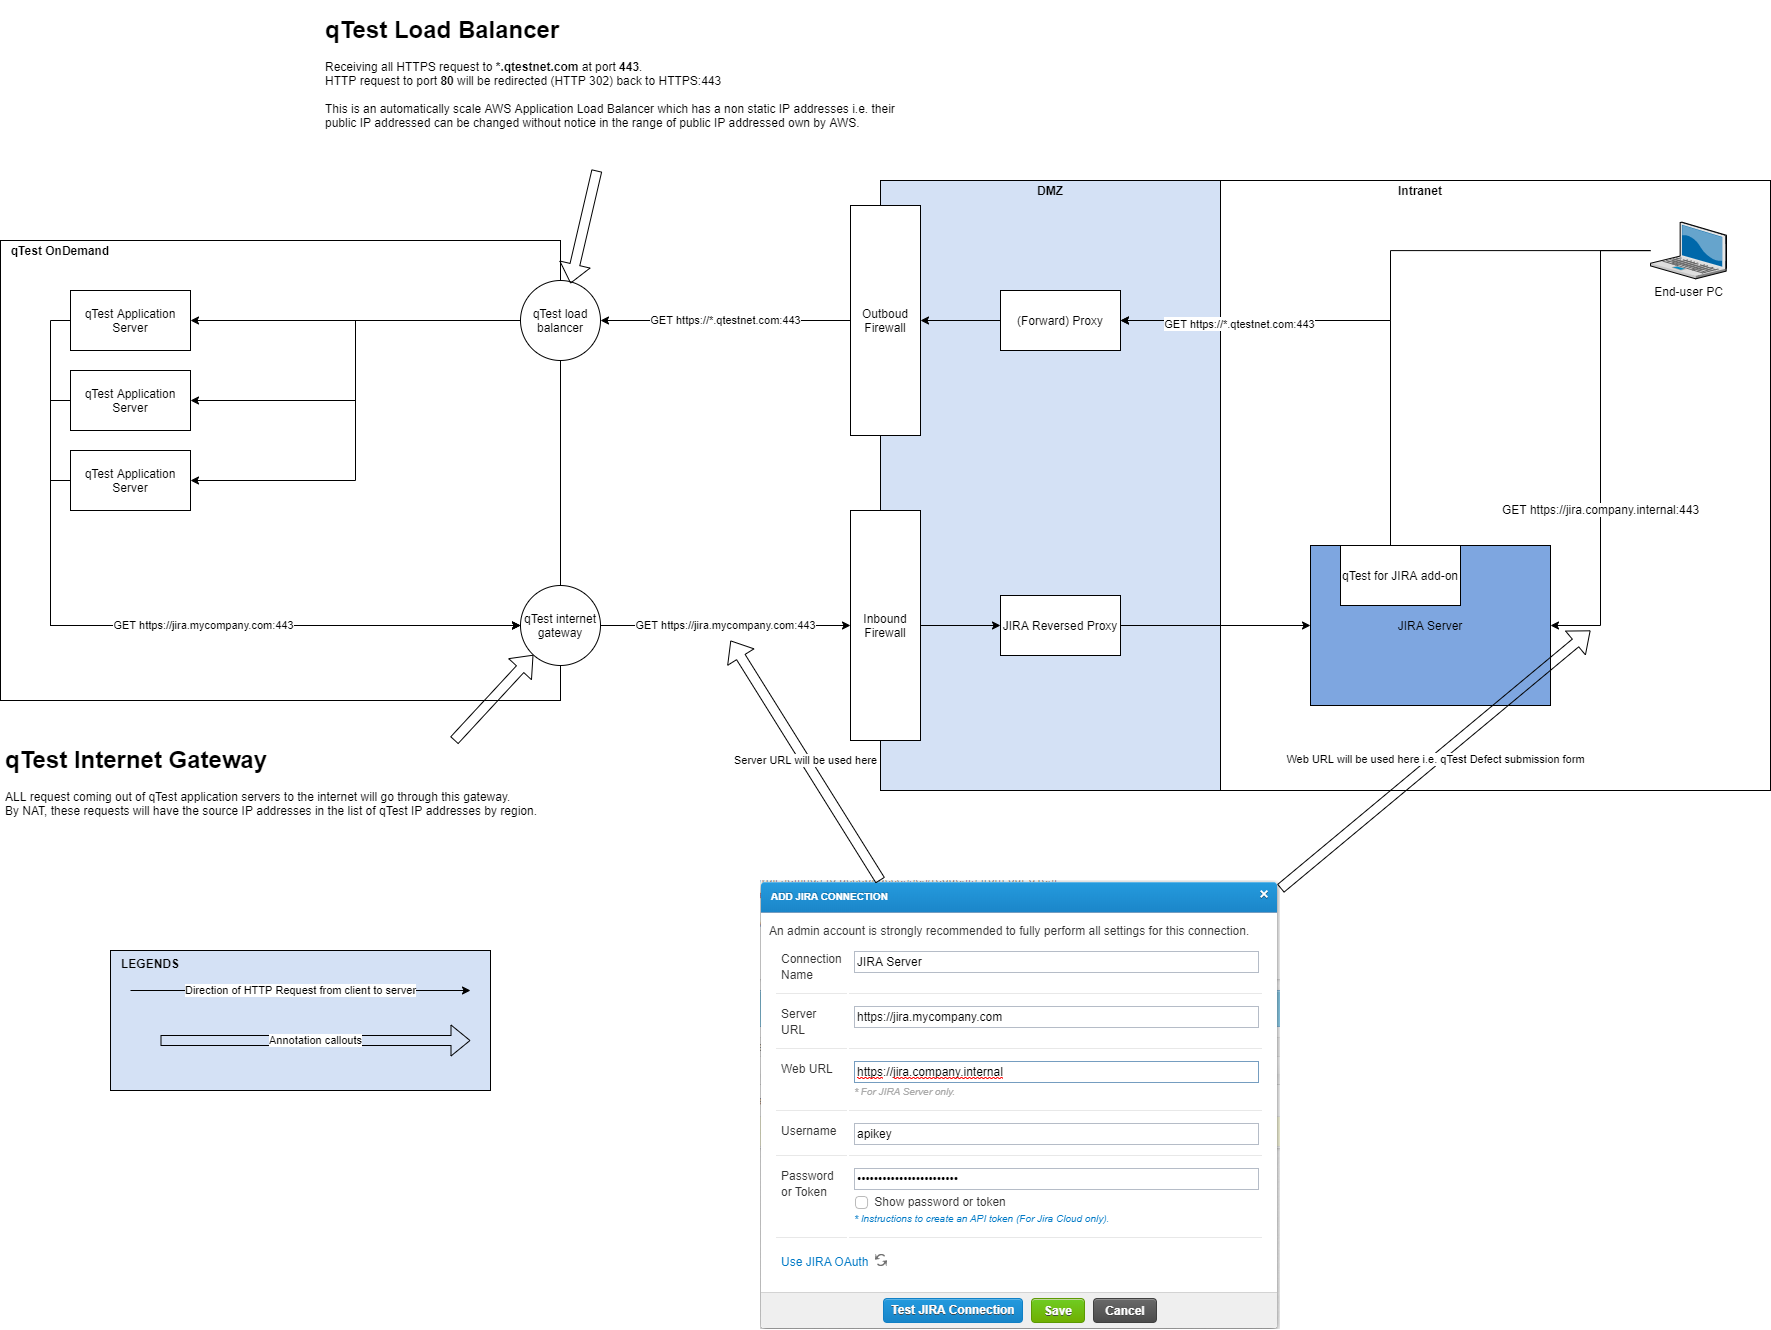
Select the Add Jira Connection icon. The Add Jira Connection dialog opens.
-
Connection Name: Enter a name that represents your Jira instance.
-
Server URL: Enter the URL of your Jira server, which will likely contain the IP address and port information.
The Server URL must match your Jira Base URL. This is the official address for traffic and APIs communication between qTest and Jira. Go to Jira > Administration > System to verify your Jira Base URL. You must whitelist your Jira Base URL.
-
Web URL: Enter the Jira URL your company uses. For a reverse proxy, enter the Jira URL for local access here.
-
Username: Must input a Jira username in this dialog.
-
Password: Password for the Jira Username entered above.
-
-
After entering the Jira connection details, select the Test Jira Connection button. If the connection between qTest Manager and Jira is successful, the following message is displayed:
'Connected to server successfully.'
If the connection is not
-
When you select the Test Jira Connection button, qTest backend services running on the provided IPs will try to send a REST API call to your Jira instance at the provided endpoint. Therefore, make sure that you have changed your system and network firewall to accept inbound connections coming from those IPs, which is entirely different from allowing traffic to flow to these IPs from your Jira server (outbound).
-
When it comes to outbound traffic from your Jira server, our webhook services do not have a static public IP address and it's strongly advisable for you to allow outbound traffic to your qTest domain instead, which should be https://<domain>.qtestnet.com
-
-
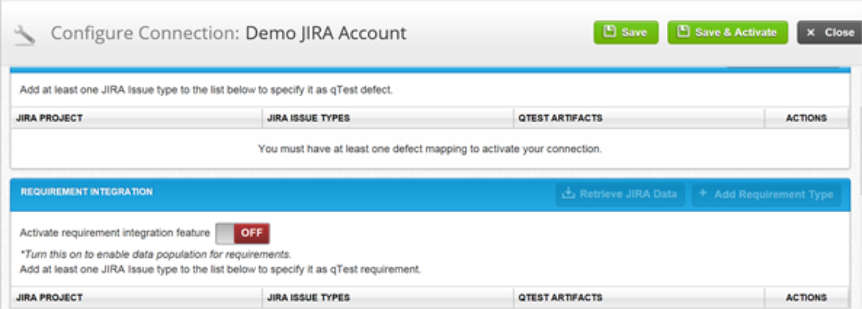
Select the Save and Configure icon.
-
The Configure Connection information page displays. From this screen, you will configure the Defect integration with Jira and then import Requirements from Jira.
Configure Jira Server using OAuth Token
The following procedure is an alternative way to allow qTest Manager and Jira Server applications to connect.
qTest provides a default private key, but you also have the option to upload your own private key. You will upload your private key in the Security tab of Site Administration before connecting with Jira OAuth.
Configure Your Connection
-
From your Jira instance, navigate to the Jira Administrator drop down.
-
Select Applications and the Jira Administration page loads.
-
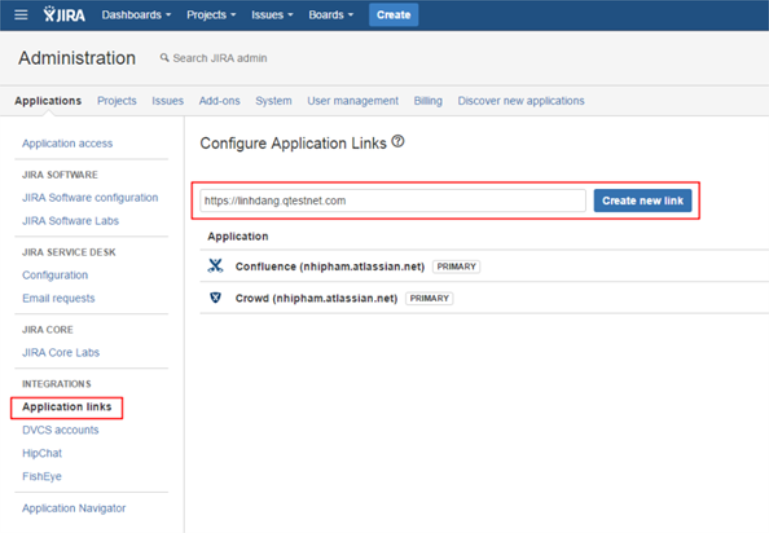
Select Application links in the Integrations section of the left panel.
-
Enter the URL of the application you want to link with. In this case, input your qTest instance URL, and select Create New Link.
-
In the next dialog, select Continue.
-
The Link Applications dialog displays. Enter information for only the Application Name.
-
The Application Type should automatically be set to Generic Application. Keep this, and select Continue.
-
You will be sent back to the Configure Application Links dialog with a list of items. Select Edit to configure.
-
The Configure Application Links page loads.
-
To create a new application link, enter your qTest Manager instance’s URL in the text field and select the Create new link button.
-
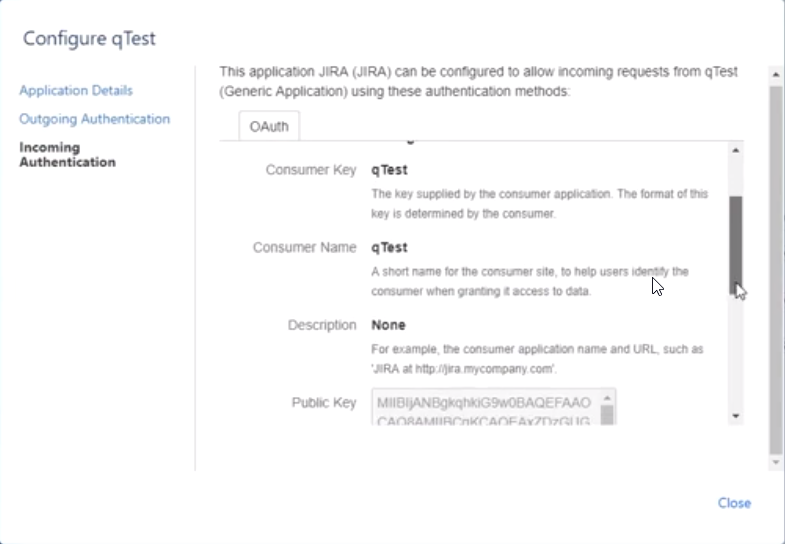
After the link is created, configure the connection as follows. Select the Incoming Authentication tab from the Configure dialog and enter the following:
-
Consumer Key: qTest
-
Consumer Name: hardcoded-consumer
-
Public Key:
CopyMIIBIjANBgkqhkiG9w0BAQEFAAOCAQ8AMIIBCgKCAQEAxZDzGUGk6rElyPm0iOua0lWg84nOlhQN1gmTFTIu5WFyQFHZF6OA4HX7xATttQZ6N21yKMakuNdRvEudyN/coUqe89r3Ae+rkEIn4tCxGpJWX205xVF3Cgsn8ICj6dLUFQPiWXouoZ7HG0sPKhCLXXOvUXmekivtyx4bxVFD9Zy4SQ7IHTx0V0pZYGc6r1gF0LqRmGVQDaQSbivigH4mlVwoAO9Tfccf+V00hYuSvntU+B1ZygMw2rAFLezJmnftTxPuehqWu9xS5NVsPsWgBL7LOi3oY8lhzOYjbMKDWM6zUtpOmWJA52cVJW6zwxCxE28/592IARxlJcq14tjwYwIDAQABIf you are an existing customer and want to use your own private key, you will need to update your Jira configuration to account for the new Private Key you uploaded in the Security tab of Site Administration in qTest.
-
-
Delete the current Incoming Authentication configuration in Jira.
-
Re-enter the Consumer Key, Consumer Name, and Public Key referenced above.
-
Save.
-
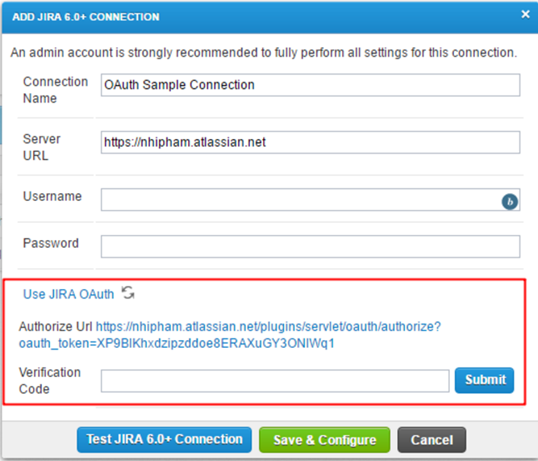
Navigate toqTest Manager, and select Add Connection. The Add Jira Connection page is displayed.
If you are using the private key option, you will need to reconfigure your Manager application and authorize the URL again with a new verification code. -
Enter the Connection Name and Server URL of your Jira instance. (Server URL is the Base URL of your Jira instance and is found in your Jira System Settings.)
-
Select the Use Jira OAuth hyperlink and qTest will create an authorization URL.
-
Select the Authorize URL hyperlink and select Allow in the Welcome to Jira pop-up.
-
An 'Access Approved' message will display and you will need to obtain the verification code from the text on the webpage.
-
Enter the Verification Code and select Submit.
-
Submit the connection Information, and select the Test Jira Connection icon.
-
Once the connection is tested successfully, select Save and Configure.
The Configure Connection page displays. From this screen, you can both configure Defect integration with Jira and import Requirements from Jira.