Create and manage groups in Tricentis User Administration
If you use
If you use Active Directory, you can use the Active Directory groups you've synchronized. If you don't want this - or if you have chosen a different method to add users - you need to create your user groups manually.
What's in this topic?
This topic is for administrators. It has all the information you need to complete the following tasks:
-
Access the groups overview, where you create and manage groups.
-
Work with the administrators group. Only members of this group have administrator rights.
-
Create a new group.
-
Add or remove users from groups, edit, and delete groups.
-
Nest groups to speed up your workflow.
Open the groups overview
The groups overview shows a list of all user groups in
To open the groups overview, access
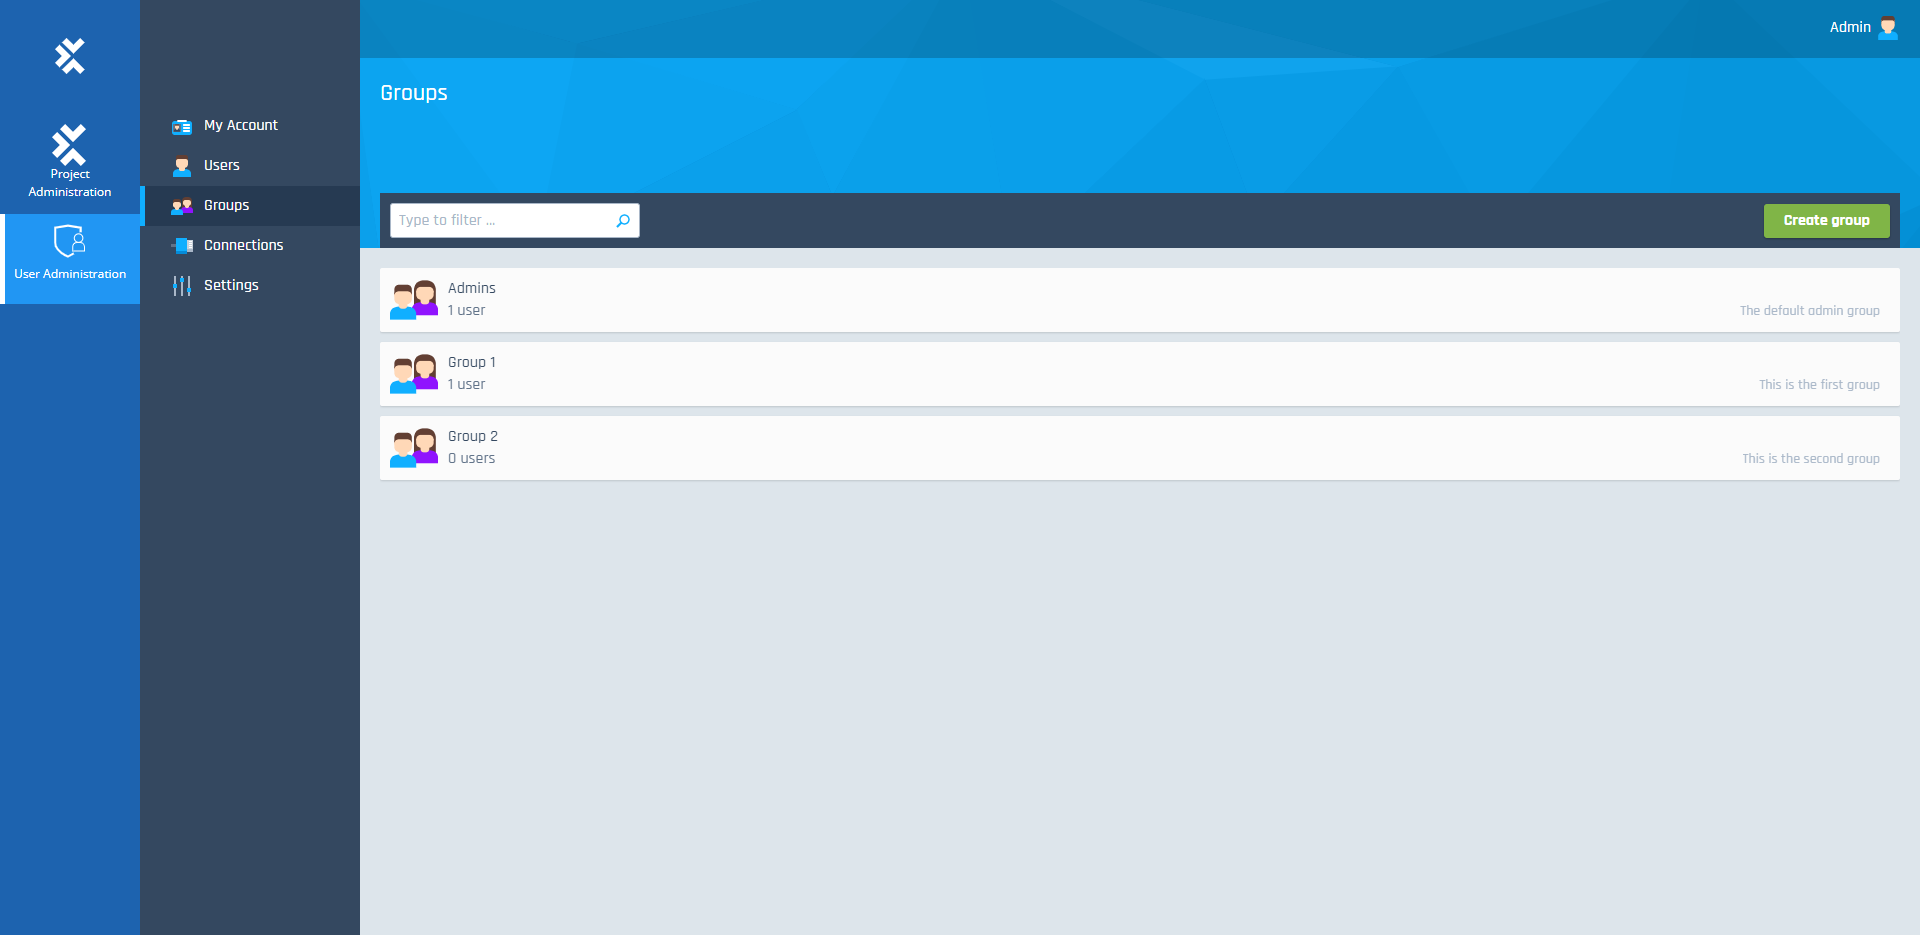
Groups overview
Work with the admin group
Every instance of
Members of the Admins group have full administrator rights in
To give users admin rights or revoke them, you need to add or remove them from the Admins group.
Create a new group
Once you have created users, you need to assign them to user groups. Let's say some of your testers need access to project A and some of them to project B. In this case, create two groups: one for project A and one for project B.
Note: this step is optional if you use Active Directory. You can use the Active Directory groups you've synchronized.
To create a new group, follow these steps:
-
Go to the groups overview and click on Create group.
-
In the subsequent dialog, define a unique group name and description.
-
Click Create.
Add or remove users from groups
You have your groups. Now it's time to add users to them. A user only has access to a project if they're in a user group which is assigned to this project.
You can also remove users from groups. If you do, they lose access to the project.
Note: this isn't possible if you use Active Directory groups in
Add users to groups
To
-
Go to the groups overview and select the group
-
In the details view of the group, click Assign users.
-
In the subsequent dialog, select the user(s) that you want to add to the group and click Assign.
Note: Active Directory or Single Sign-On users need to sign in before you can see their account in

Assign users to a group
-
Click Save.
Remove users from groups
To
-
Go to the groups overview and select the group
-
In the details view of the group, click Assign users.
-
The right side of the subsequent dialog shows all users that are part of this group. Select the user(s) you want to remove and click Remove.
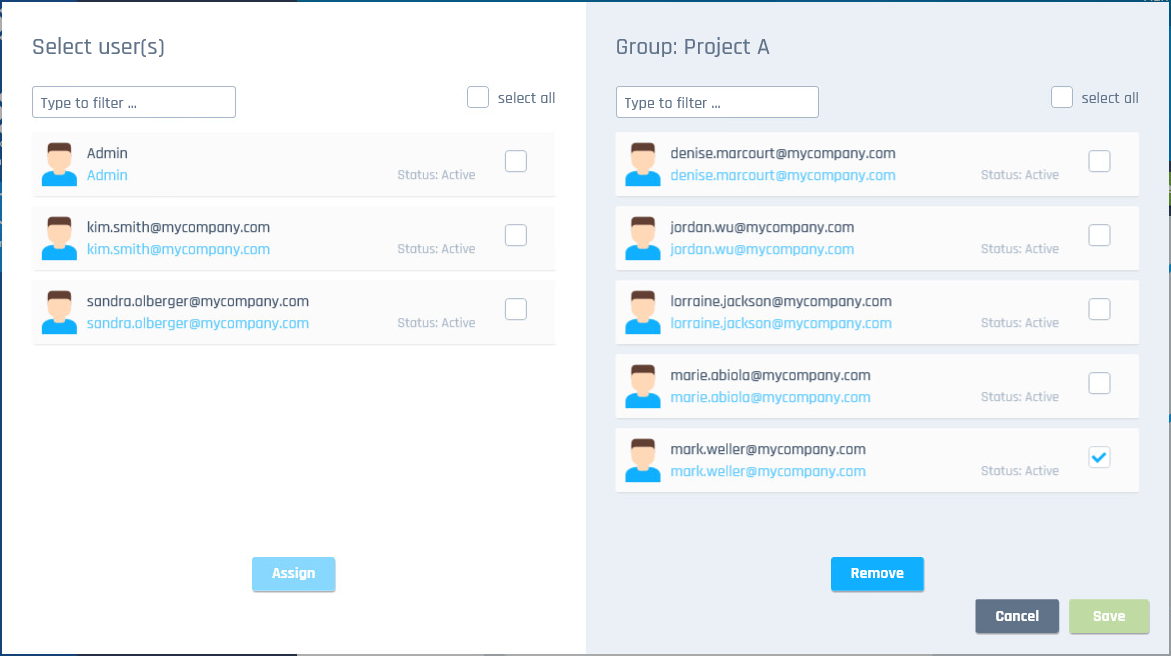
Remove a user from a group
-
Click Save.
Edit the group name or description
If you want to give your group a more descriptive name or change descriptions, you can do so.
Note: this is only possible for groups you created manually. You can't edit Active Directory groups in
To edit your group name or description, follow these steps:
-
Go to the groups overview and select the group you want to edit.
-
In the details view of the group, perform one of the following actions:
-
To change the name, click into the name field and type in a new name.
-
To change the description, type a new description into the Description... field.
-
Delete a group
If your test project is finished and you no longer need a particular user group, you can delete it. This removes the group and all its assignments; it doesn't remove the users themselves.
Note: if you use Active Directory, you can't delete groups. Instead, you can remove groups from their connection. However, this does delete the users in this group from
To delete a group, follow these steps:
-
Go to the groups overview and select the group you want to delete.
-
In the details view of the group, click Delete.
-
In the subsequent confirmation dialog, click Delete again.
Nest groups
Every user that should have access to a project has to be in a user group that's assigned to this project.
Nesting groups speeds up your workflow:
-
You don't have to assign each individual group to a project in
-
You don't have to specify viewing and access rights for every group if you synchronize with Tosca Commander. Child groups inherit rights from their parents.
To
-
Go to the groups overview and select the group
-
In the details view of the group,
-
To
-
To
-

|
You can't nest groups that you synchronized from Active Directory within each other. You can only make them child groups to groups that you created in |

Choose a child or parent group for the user group Project A
-
In the subsequent dialog, select the group(s) and click Assign.
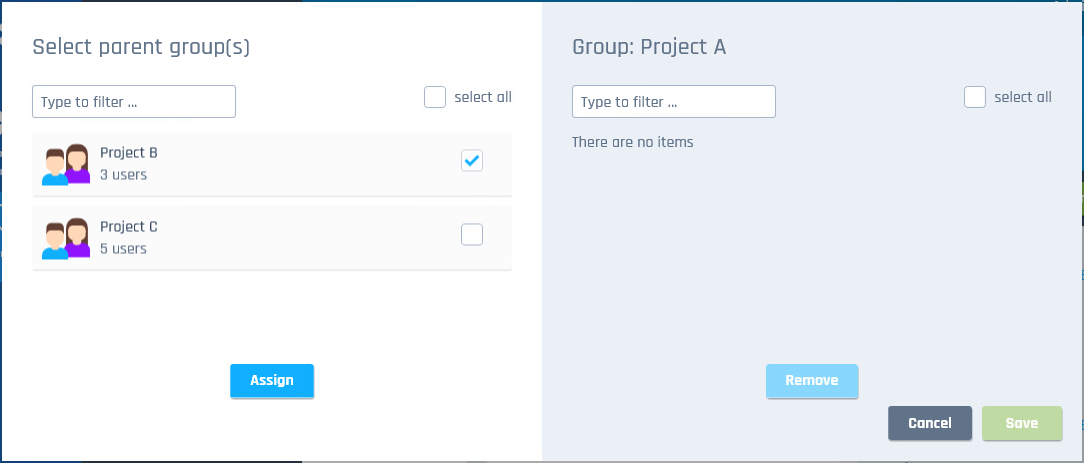
Select the user group Project B as a parent to user group Project A
-
Click Save.
Resolve assignments
If you accidentally nested the wrong groups - or if you don't need a particular hierarchy anymore - you can resolve the parent-child relationship in
To
-
Go to the groups overview and select the group
-
In the details view of the group,
-
To
-
To
-
-
The column on the right side of the subsequent screen shows all child or parent groups. Select the ones you want to remove and click Remove.
-
Click Save.
What's next
Now that you have your groups, it's time to assign them to projects. This gives the users in your groups access to your Tosca test projects.