Submit Defects in Test Execution
You can log a defect if a Test Run fails or requires additional development effort. There are various ways you can submit a defect from the Test Execution area:
-
Submit a defect during Test Execution using the Quick Run or Test Pad window. For more details on Quick Run and the TestPad, refer to Execute Test Runs.
-
Use the Test Log in Execution History to submit a defect AFTER executing a Test Run.
This article explains how to submit defects to qTest Manager as well as Jira. Read the Submitting Defects sections within each Integration Guide if you use another tool to track defects.
Submit a Defect During Test Execution
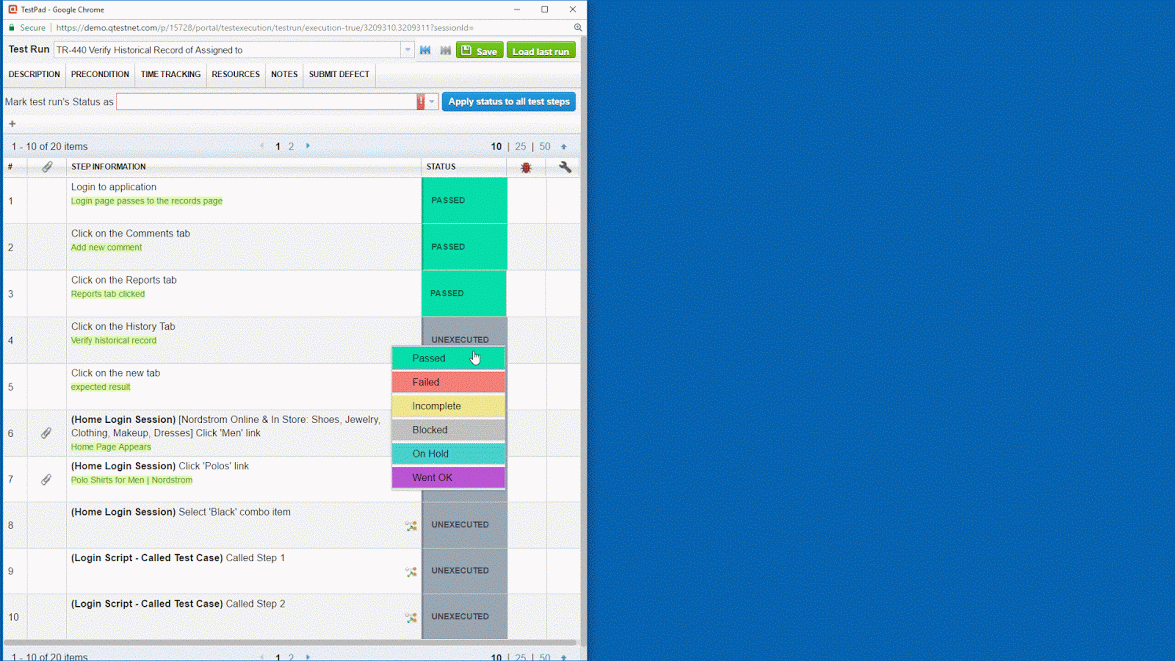
You can submit defects from an individual Test Step Log, or, from an entire Test Log in the TestPad. Alternatively, submit defects from a Test Log in the Quick Run window. Either way, when you click on the Defect (bug) icon, the New Defect Submission Form opens so that you can input the relevant Defect information to create a new defect. Click Save or Save & Close.
TestPad

Quick Run
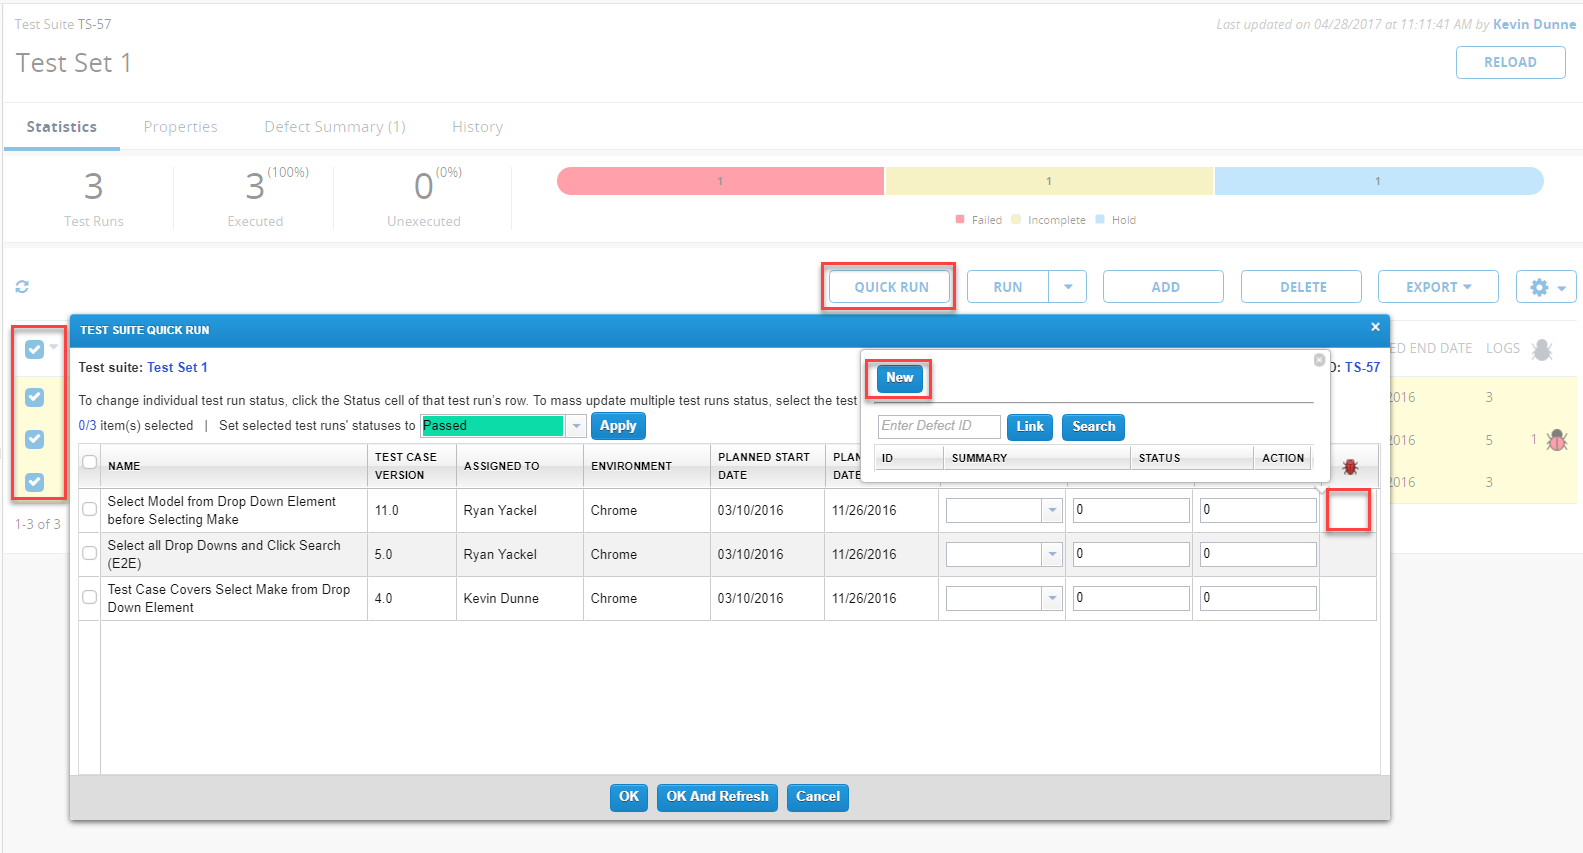
Try This: Submit a High Priority Defect From Within the TestPad
Submit a Defect After Test Execution in Test Log
If you forgot to during test execution, submit a defect or link to an existing defect from the appropriate Test Run's Test Log.
You can also use this feature when reporting failed results from Jenkins/Bamboo or through qTest's Automation Scheduling capabilities.
-
Navigate to the appropriate Test Run and select the Execution History tab.
-
Find the Test Log line item for which you want to submit a defect.
-
Select the Defect (bug) icon:
-
From the Test Log line item to submit/link defects for an entire Test Log
-
In the Test Log Details to submit/link defects to individual Test Steps of an executed Test Log
-
-
The Defects widget opens.
-
Select New to submit a defect linked to the Test Log. The New defect window opens. Enter the required information.
-
If you want to link the Test Log/Test Step to an existing defect, enter the Defect ID (if known) and select Link.
-
Once you enter the defect, you can close the dialog.
Autopopulating Defect Data
By default, your defect's Description field will only auto-fill with the Test Steps Description when you submit a defect linked to an individual Test Step.
To configure more fields with auto-fill behavior, you can set this up in Field Settings under the defect artifact. If using Jira. this can be set up in the project's Integration Settings area.
Using qTest Manager Defects
Submit a new Defect in qTest Manager
-
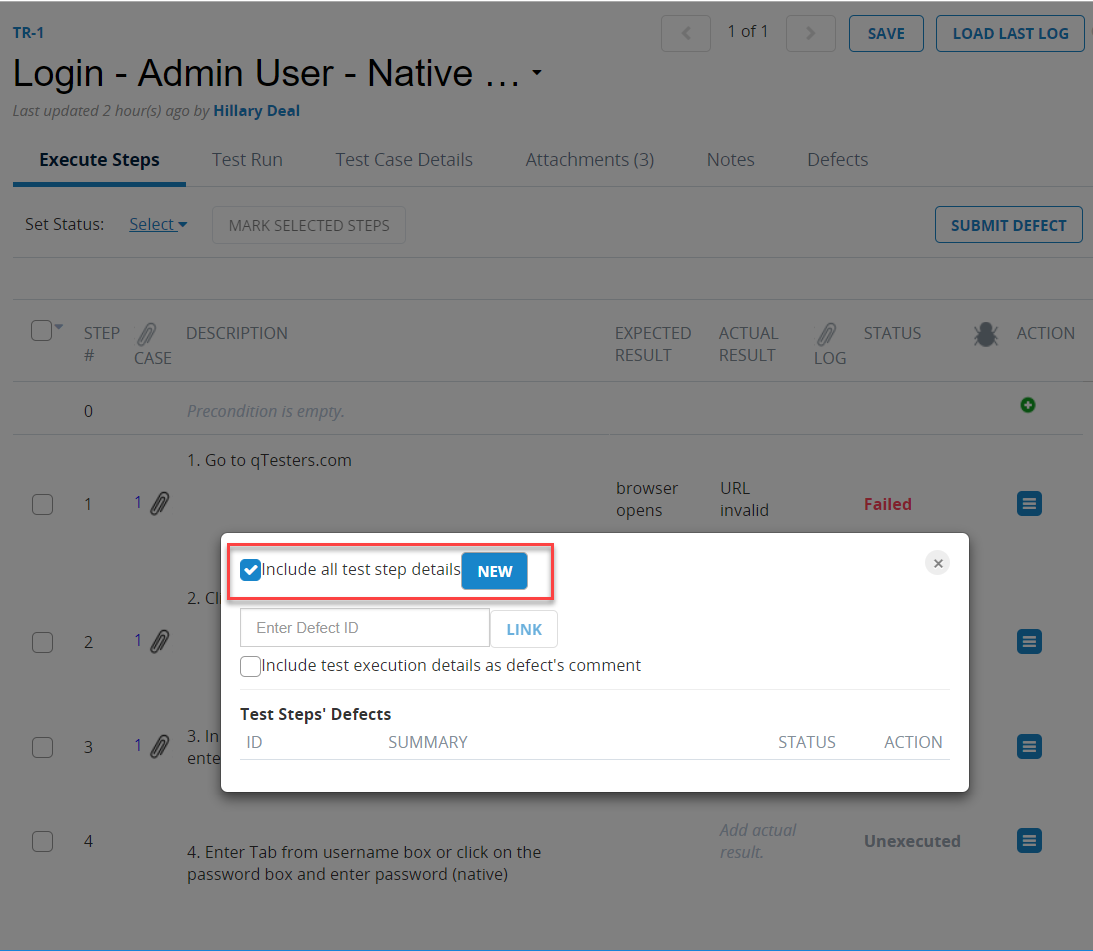
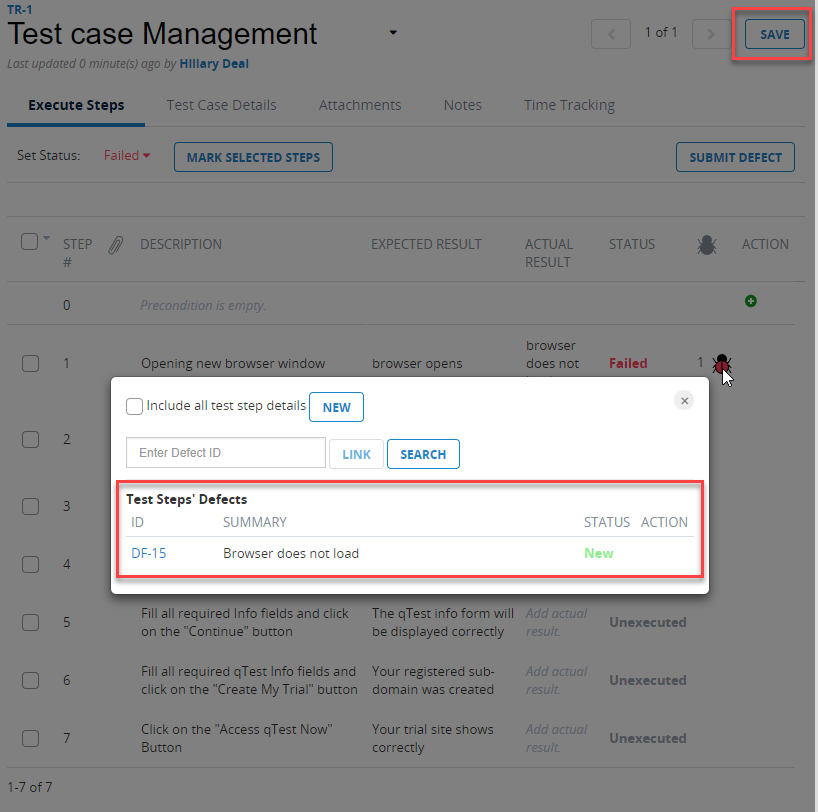
Select the Defect (bug) icon for the Test Step that failed.
-
The Submit/Link Defects widget opens.
-
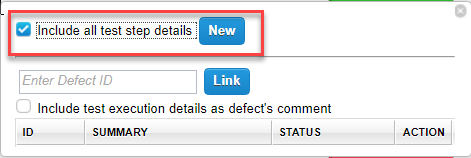
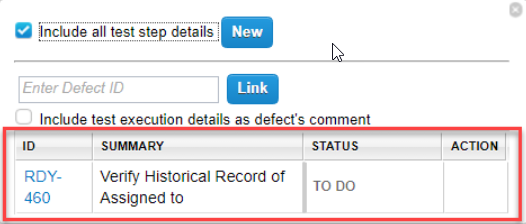
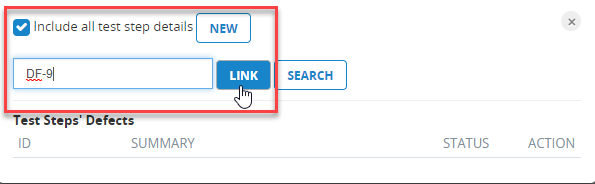
Select the Include all test step details check box on the widget.
We recommend selecting this check box so that when a developer reviews this defect, they will understand the steps to reproduce it.
-
Select the New button.
-
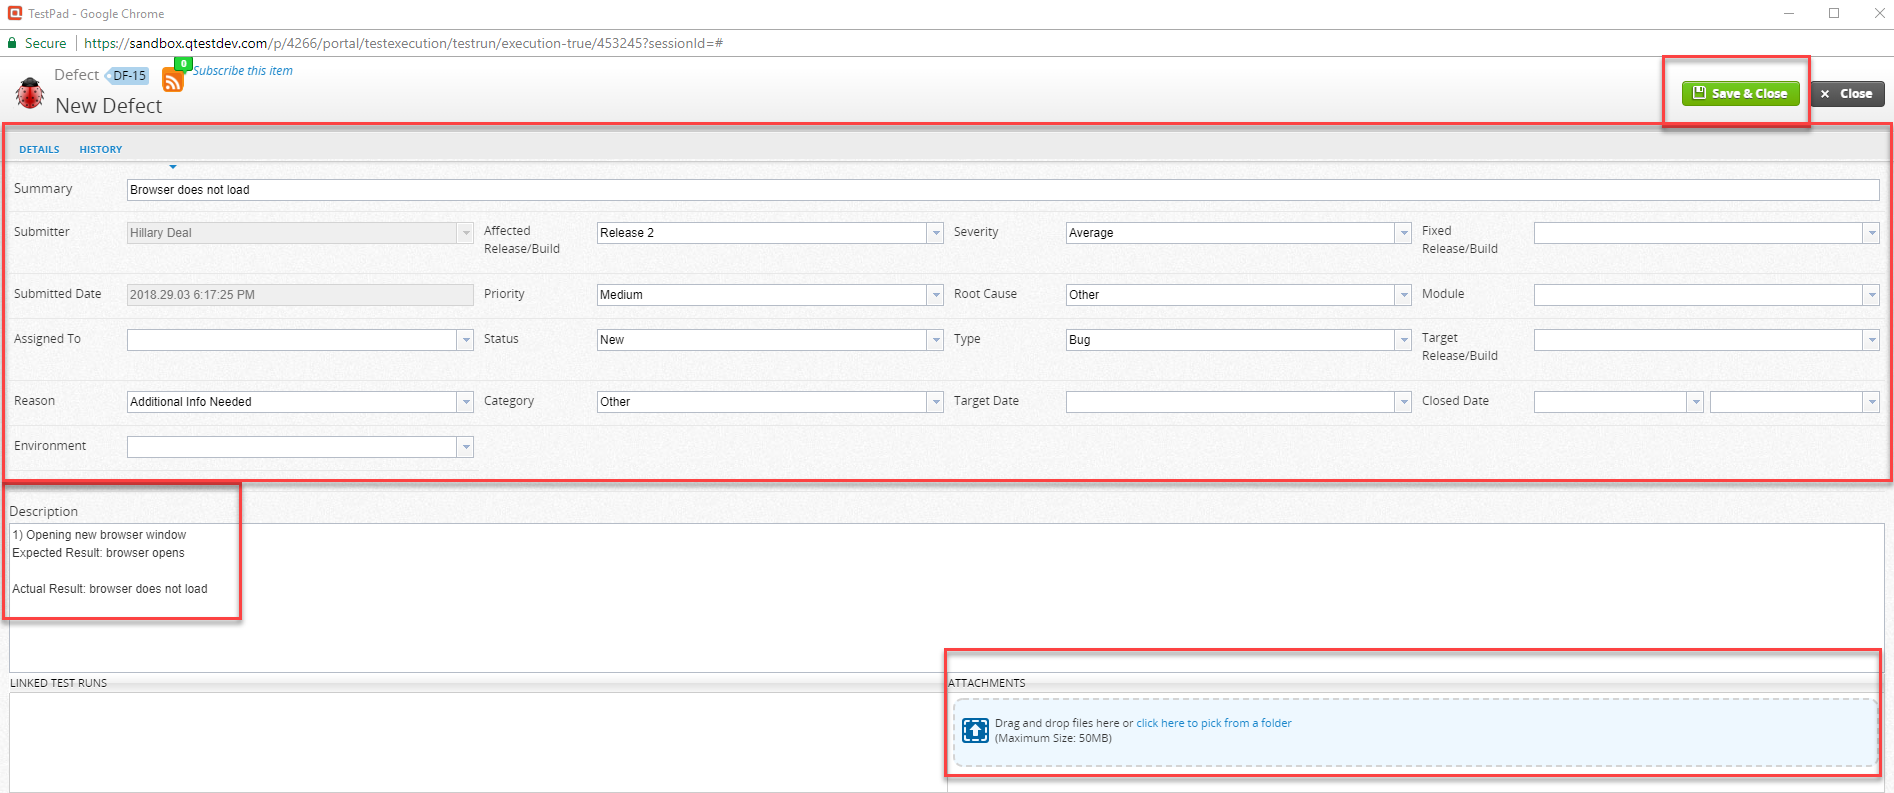
The New Defect window displays.
-
In the Summary field, enter the name of the defect.
-
Complete the additional fields.
The fields on the page are created in Field Settings and determined by the user. If you select the ‘Include all test step details’ check box, all of the steps leading up to where the test failed will copy from the Test Run to the Description area of the New Defect page. If you wish, you can take a screenshot of the error and upload it to the Attachments section of the Test Step or the Test Run. -
Select Save & Close. The Test Pad or Quick Run window will reload.
-
To verify the defect has been created, move the cursor to the Test Step that failed, and select the Defect (bug) icon. The defect's ID, summary, and status (‘New’) display.
-
In the Mark Test Run’s Status as field on the TestPad, select the down arrow to open the drop-down and select Failed.
-
Save.
Submit a Defect at the Test Case level
-
Once in the Test Execution platform (tab), select the Feature and Requirements you want to test.
-
Select the drop down menu next to Run and select Test Pad Only.
-
To submit a Defect at the Test Case Level, select Failed from the drop down menu next to Set Status.
-
Select Submit Defect and search for the Defect by name or create a new Defect.
-
Once your Defect has been created, select Save.
Submit a Defect at the Test Step level
-
Once in the Test Execution tab, select the Feature and Requirements you want to test.
-
Select the drop down menu next to Run and select Test Pad Only.
-
To submit a Defect at the Test Step Level, select the Step Numbers that have passed. Select Passed from the drop down menu next to Set Status and select Mark Selected Steps.
-
For the Step Numbers that have failed, change the status to Failed and select Mark Selected Steps.
-
For the Step Number that has failed, next to its status select the Submit Defect icon. The icon will appear as a bug when your cursor moves over it.
-
Search for the Defect by name or create a new Defect.
-
Select Save.
Link to an Existing Defect in Manager
-
Select the Bug icon for the Test Step that failed.
-
The Submit/Link Defects widget opens.
-
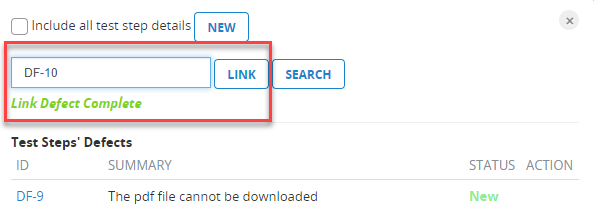
Enter the existing Defect ID in the Enter Defect ID field.
-
Select Link to link the defect to the existing defect.
-
At the top of the TestPad, select the status of the Test Run.
-
Save and then close the Test Pad.
Test Execution pages (Test Suite and Test Run) automatically refresh with the most current Test Execution information when you close the TestPad. If you are in the middle of making changes to any Test Execution properties and have not saved, and you close a TestPad, the background page will not refresh until you confirm you want to save your changes.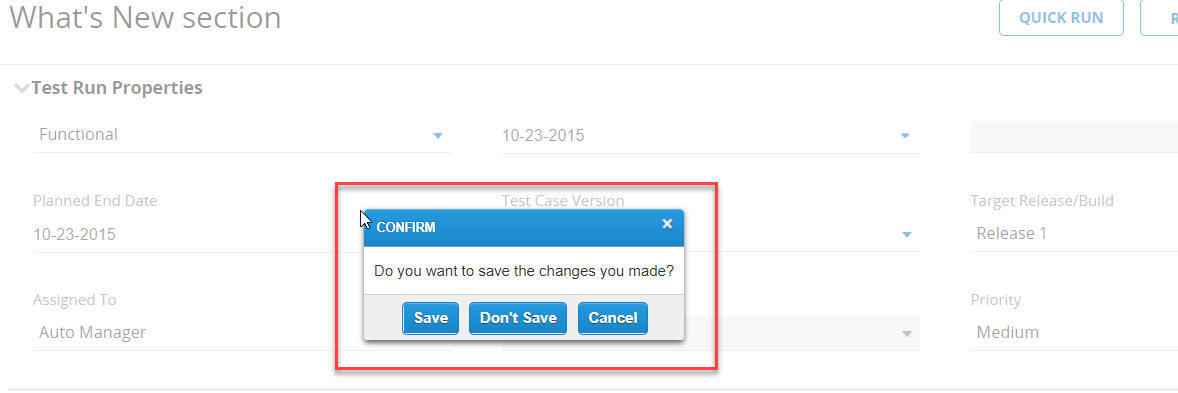
Review Defects in qTest Manager
In qTest Test Execution, you can find defect information in many areas:
Test Run page
-
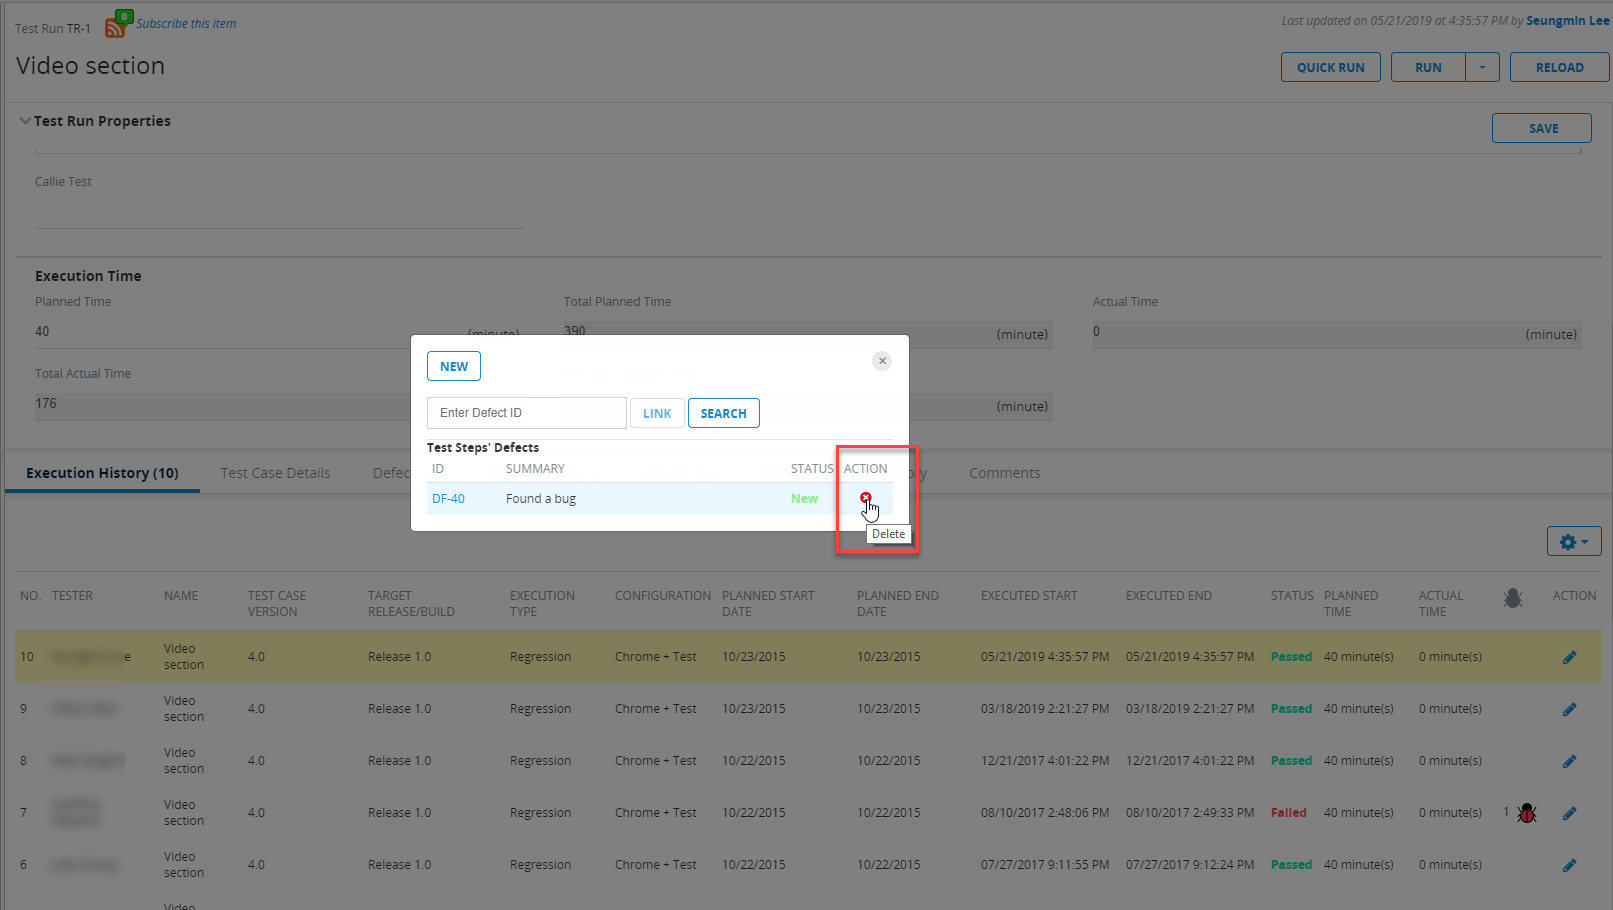
To view defects in a particular Test Log, select the Defect icon from the Execution History grid.

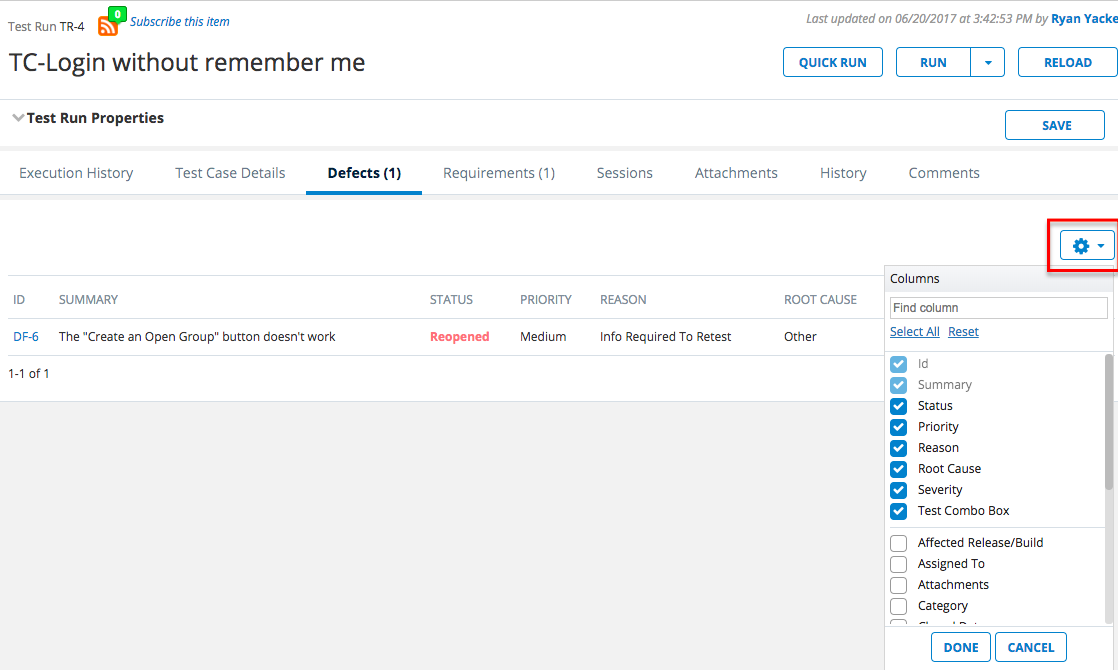
-
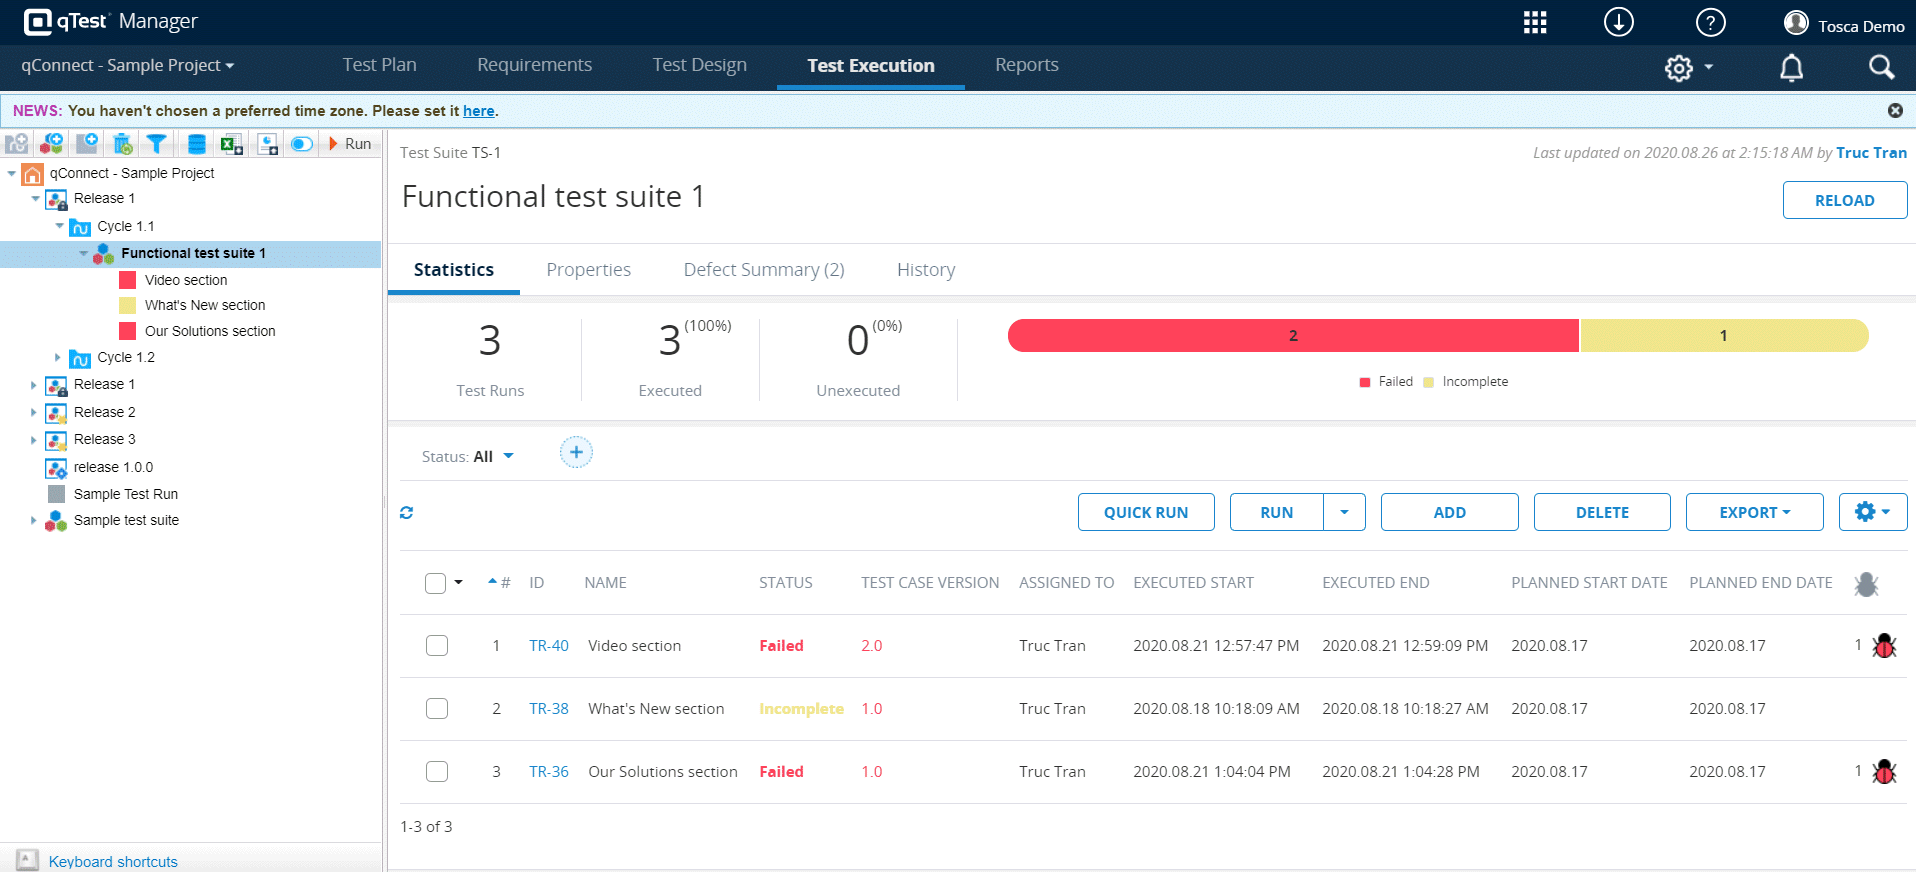
For an aggregate list, select the Defects tab for a roll-up of all defects related to any of the test logs of the Test Run. The Defects tab can be customized so you can display additional defect fields as columns.
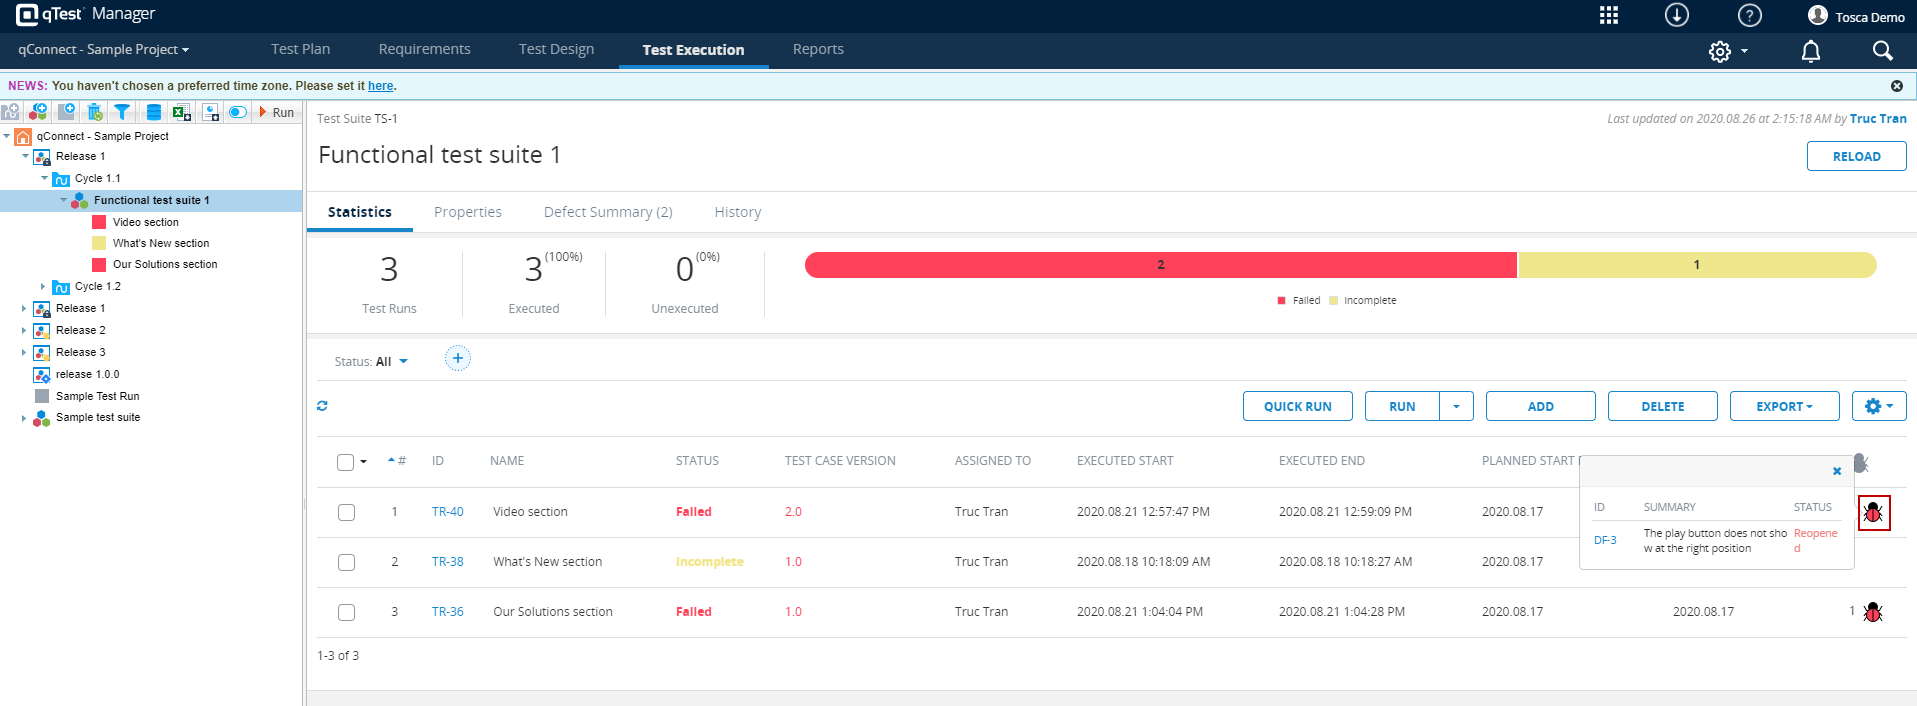
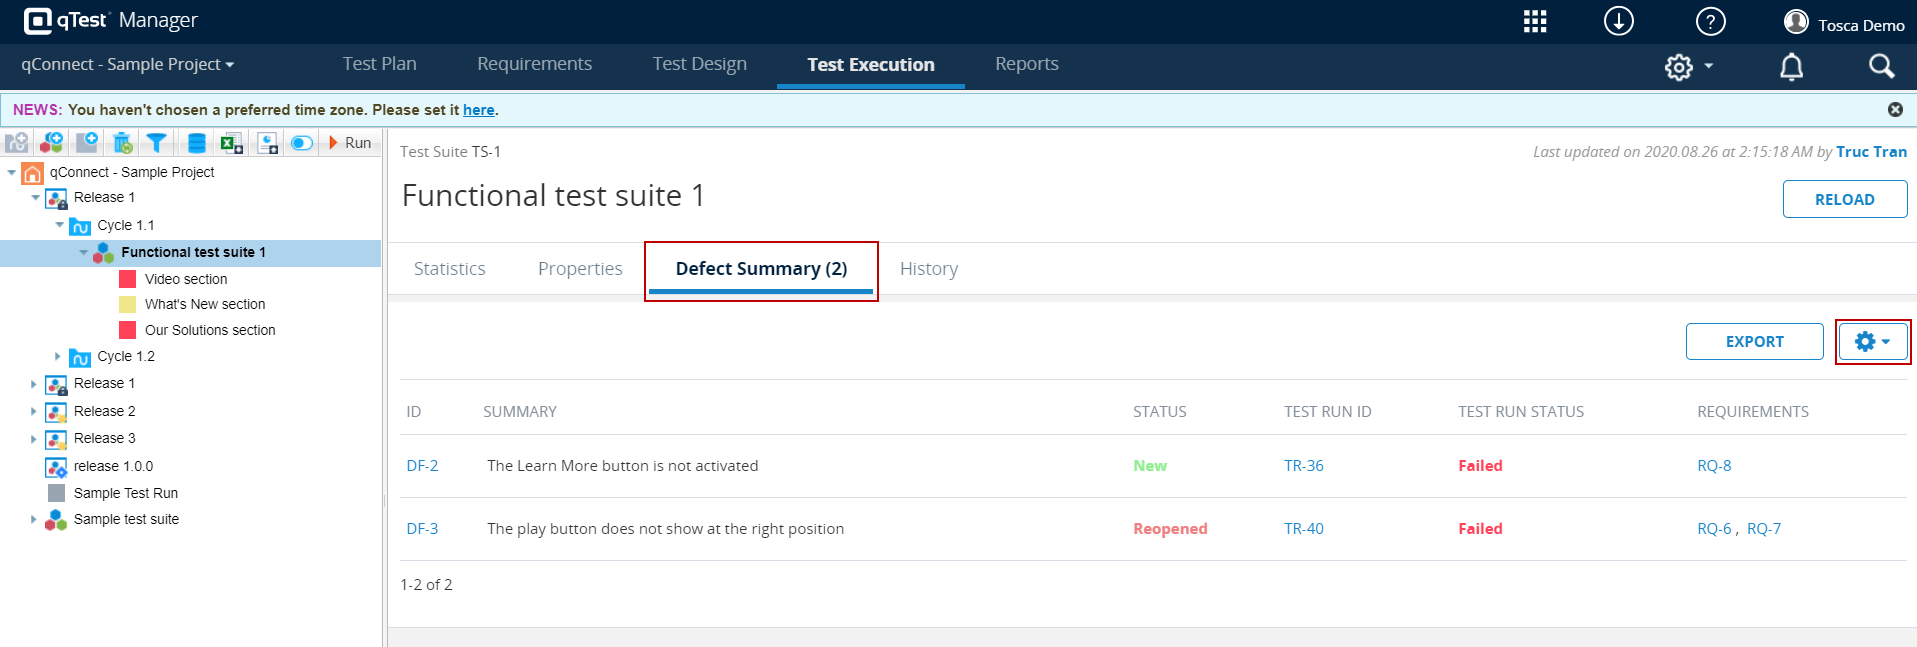
Test Suite, Cycle, and Release pages
-
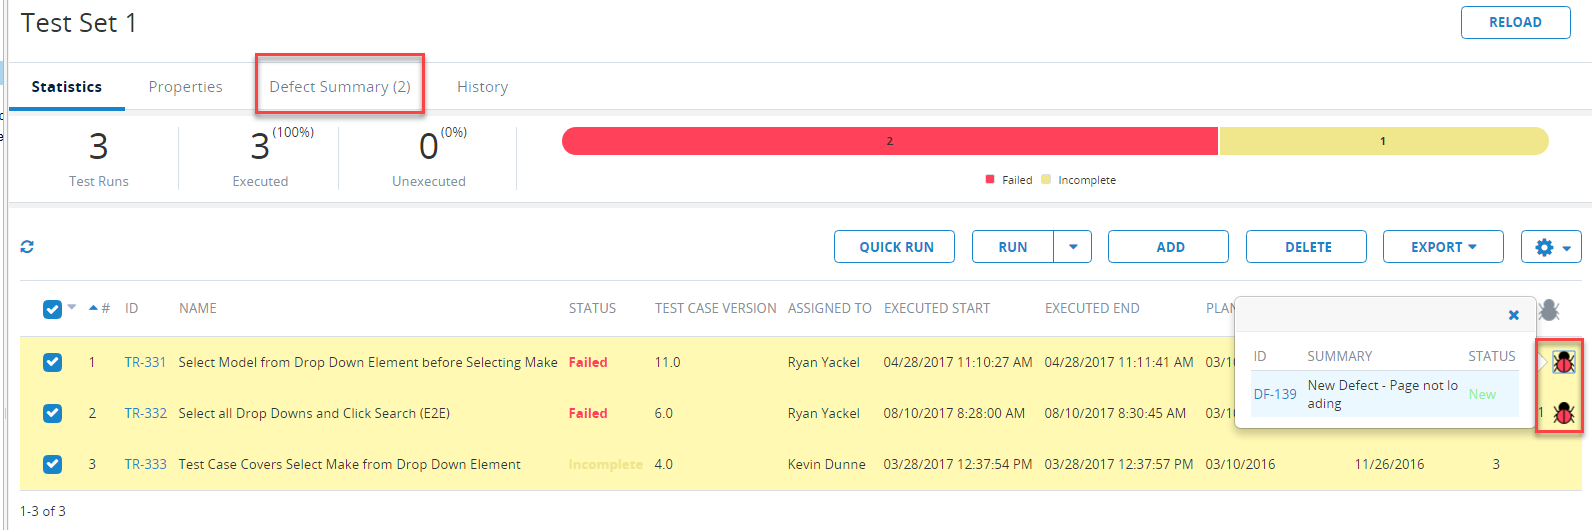
To view defects for a single Test Run, select the Defect icon from the Test Run grid.
-
For an aggregate list, select the Defect Summary tab for a roll-up of all defects related to associated Test Runs. This Defect Summary tab can be customized so that you can display additional defect fields as columns.

For advanced reporting, use qTest Insights to gain more defect visibility.
Using Jira Defect Integration
Before you submit a defect from qTest Manager to Jira, make sure you have correctly set up your integration and installed the browser plug-in from the resource center.
The browser plug-in allows for a native submission experience to Jira, so you are not continuously required to map system fields. This plug-in requires no settings and works immediately upon installation.
Submit a New Defect into Jira
-
Select the Defect (bug) icon for the step that failed.
-
The Submit/Link Defects widget opens.
-
Select the New button.
-
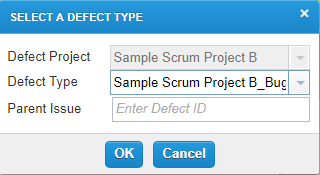
The Select a Defect Type widget is displayed.
-
Leave the Defect Project field blank.
Recall during setup that on the Jira Integration Configuration page, you selected a Jira project and Jira issue type. When you want to create a defect, the system asks you what Jira project and Issue type you want to select. -
In the Defect Type field drop-down list, select the Jira project and Jira issue type that represents the defect (such as, bug, task, etc.) to create in Jira.
-
Select OK.
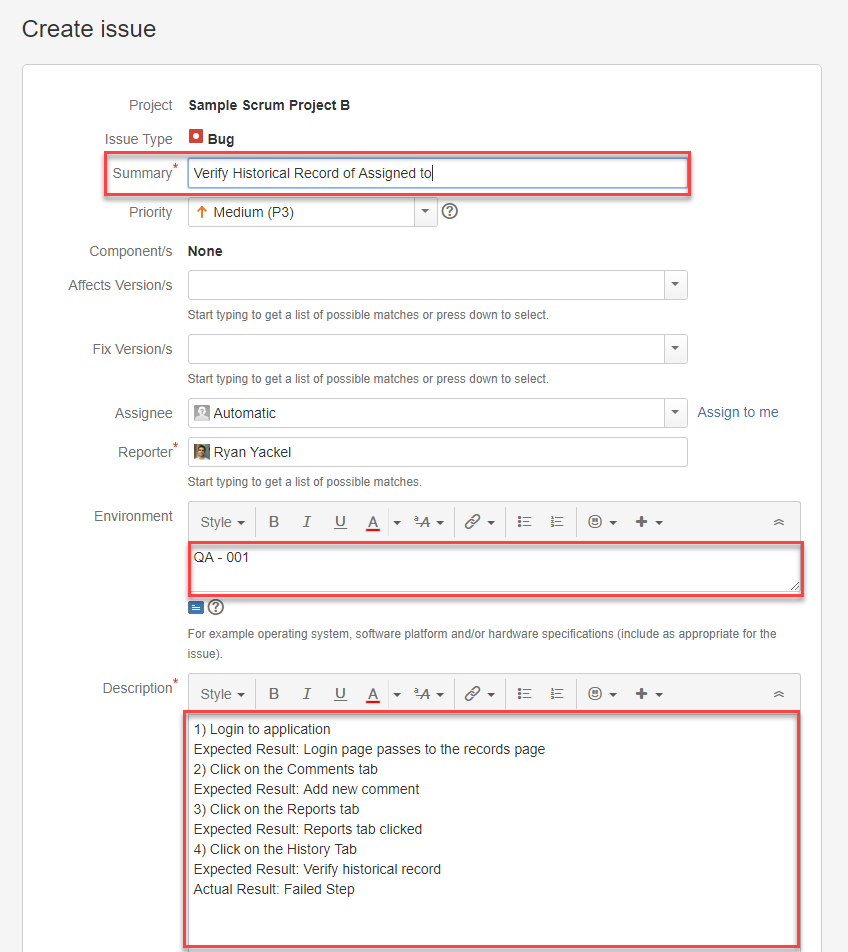
If the browser plug-in is not correctly installed, or you decide to not install the plug-in due to your company’s security policies, the Defect Submission window in qTest Manager displays. -
Fill in all necessary details with regard to how your team enters a Jira ticket for a bug. The steps that reproduce the test, up to where the test failed are auto-populated in the Description field. Complete the rest of the Jira issue form.
-
Select Create at the bottom of the native Jira page to create the defect in Jira. The Test Run page in qTest Manager is re-displayed, and the Jira window will automatically close.
-
Now that you have linked a test to a new defect in Jira return to the TestPad in qTest Manager. Complete the TestPad, and then save. Close the TestPad, and the created Jira ticket is briefly displayed.
-
On the Test Run page, refresh your browser or click the Reload button, so that the recently executed log displays in the Execution History area of the page.
-
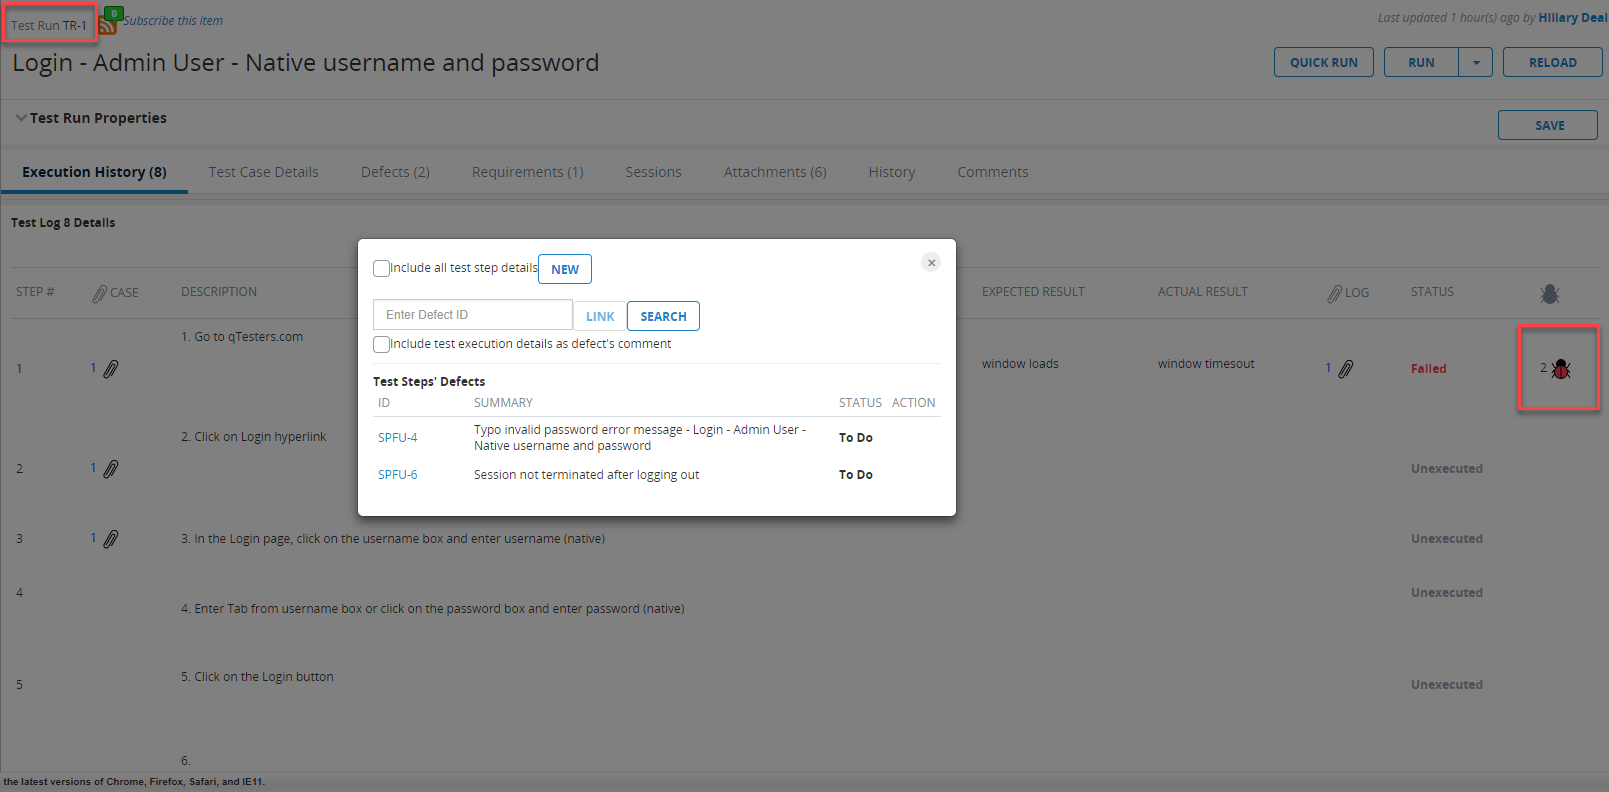
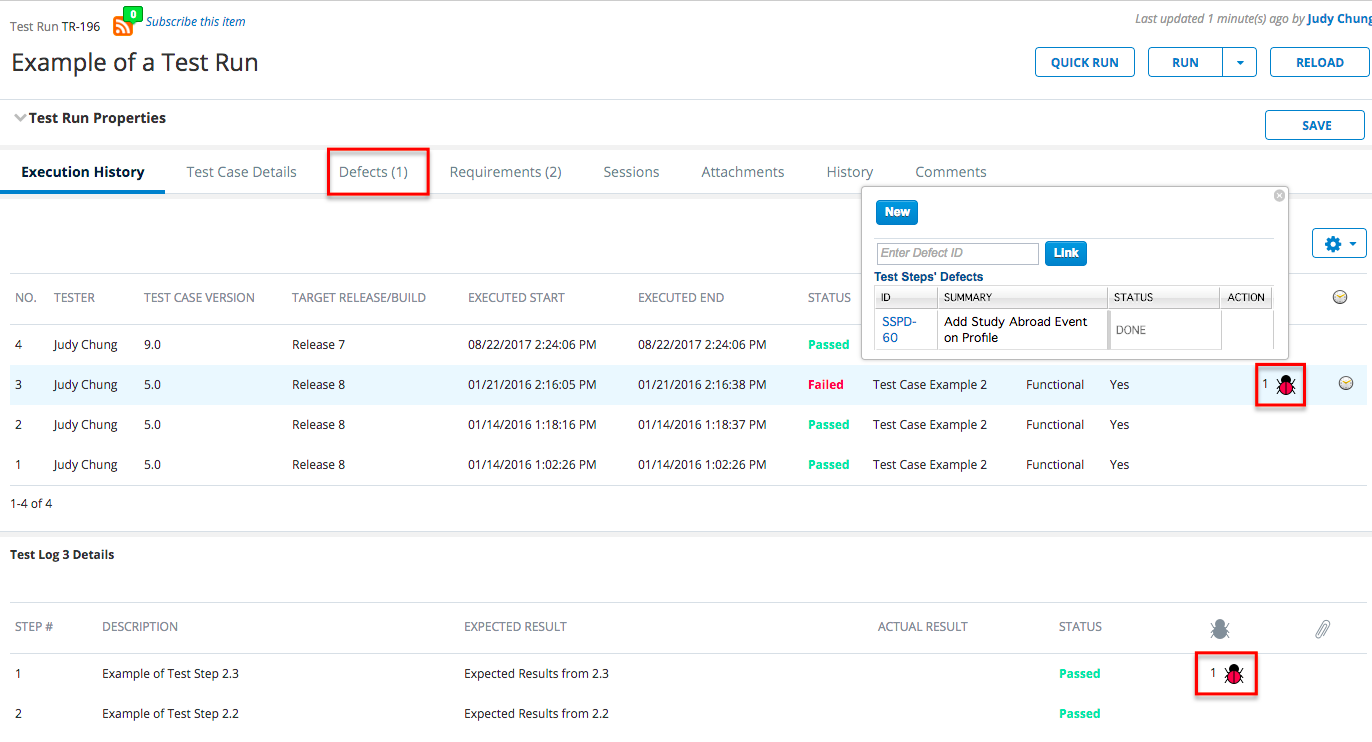
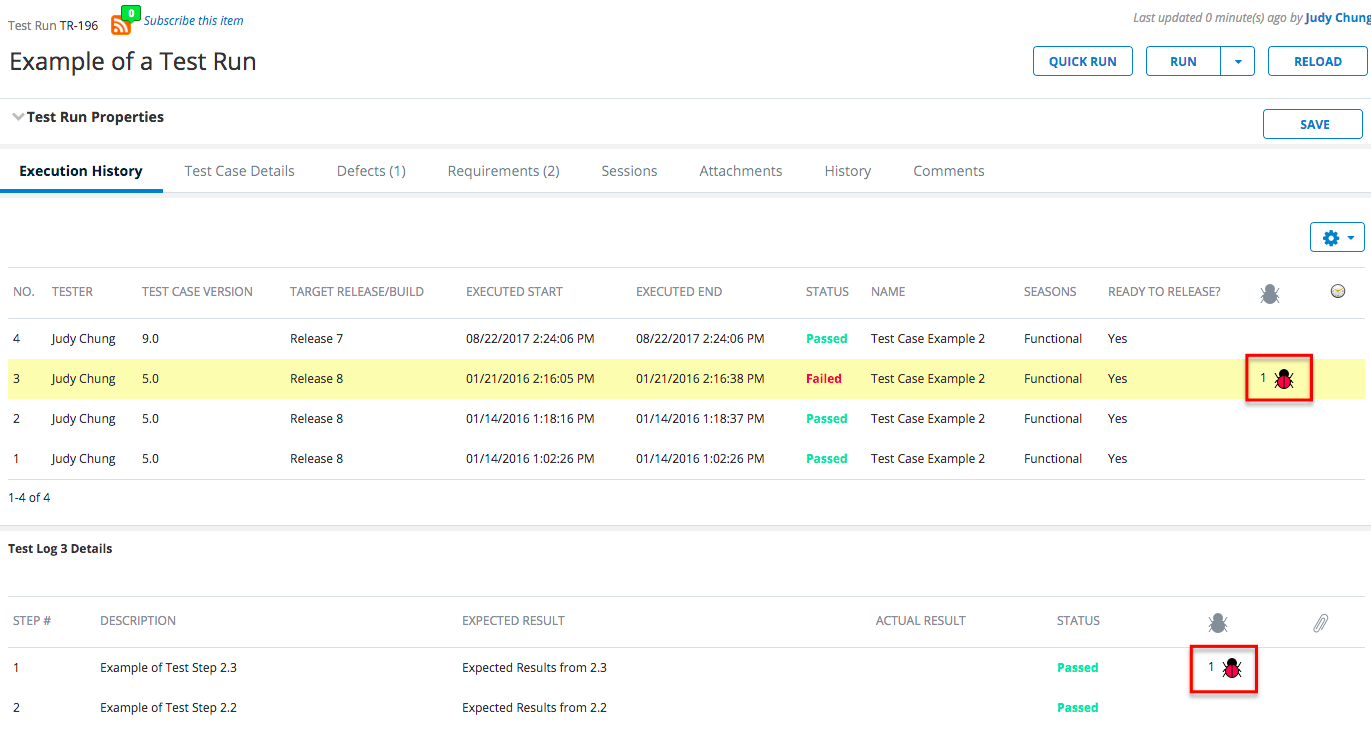
To view the defect that was submitted during the execution, refer to the Execution History area of the Test Run page. The red defect icon displays in two areas.
-
The test log shows the defect occurred at the Test Run level.
-
The test step log shows the specific step where the defect occurred.
-
In the example below, the Test Run executes four times, and the Defect icon will display in both the test log and the test log details. Additionally, 'Defects (1)' displays in the tabs along the top as a visual indicator of the total number of defects associated with this Test Run.
Link to an Existing Jira Defect
When executing a test, you may find a defect that was previously reported and already exists in Jira. In this case, it is useful to link to the existing defect in Jira. rather than create a duplicate defect. To link to an existing defect in Jira, perform the following steps:
-
Select the Defect (bug) icon for the failed step.
-
In the Enter Defect ID field, enter the Defect ID of the existing defect you want to link.
-
Select the Include Test Execution details as defect’s comment check box.
-
Select the Link button to link the defect to the existing defect.
 The defect is linked when the bug icon in qTest Manager is red.
 -
Click the ID hyperlink. The system redirects you to the Jira issue. Note that a new comment in the Jira issue shows the developer the steps to reproduce.
-
If you want to search Jira defects, select the Search button.
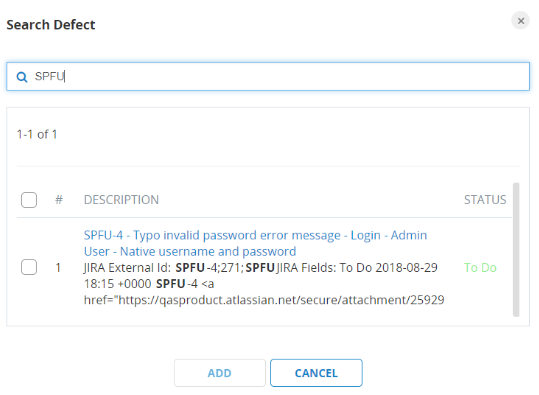 Search Jira defects functions as long as you have enabled the 'Also populate Jira defects that are not linked to Manager Test Runs' option in your Jira Integration settings.
 -
Locate the desired Defects and select the appropriate check boxes and select Add.
If your Search is not returning results, make sure to select the Fetch Jira Defect button again in your Jira Integration Settings page.
Review Jira Defect After Submission
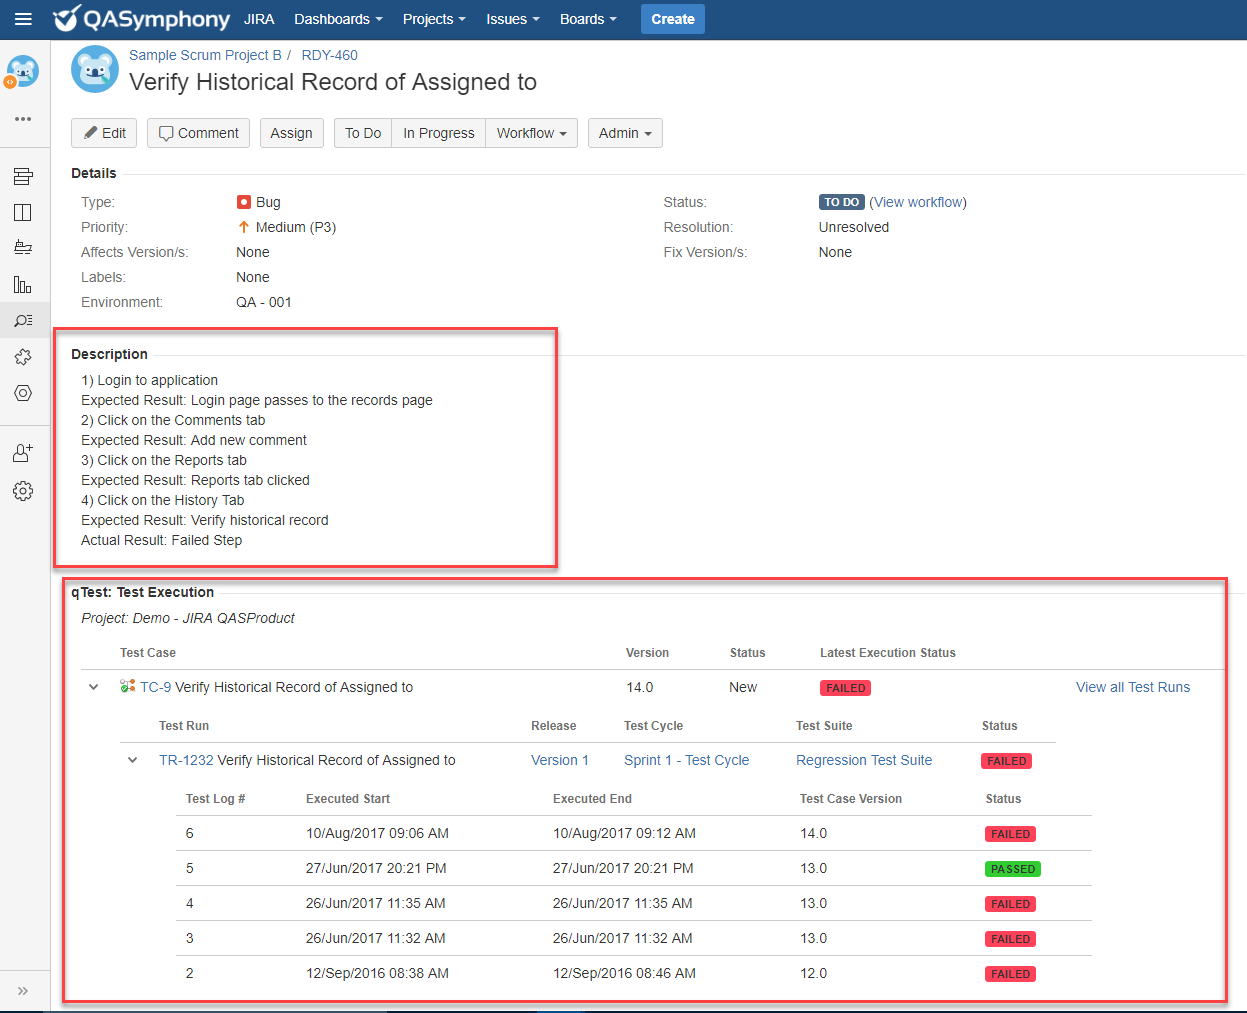
The defect in Jira will show qTest Manager Test Execution information, as well as other properties that you chose to auto-populate from Manager to the Jira issue.
Within the Jira issue, you will see the following:
-
Test Run properties
-
Test Run execution status and history
-
Impacted user stories impacted by the defect
-
Attachments from Test Logs
If you are a Jira Cloud customer, refer to View qTest Test Execution Data in Jira for additional information available in the Test Execution iframe.
If your test case is associated with a Jira requirement, the execution history will display and automatically link a Jira defect issue to that requirement.

Review Jira Defects in Manager
In qTest Test Execution, you can find Jira defect information in many areas:
Test Run page
-
To view Jira defects in a particular Test Log, select the Defect icon from the Execution History grid.
-
For an aggregate list, select the Defects tab for a roll-up of all Jira defects related to any of the test logs of the Test Run. The Defects tab can be customized so you can display additional Jira defect fields as columns.

Test Suite, Cycle, and Release pages
-
To view Jira defects for a single Test Run, select the Defect icon from the Test Run grid.
-
For an aggregate list, select the Defect Summary tab for a roll-up of all Jira defects related to associated Test Runs. This Defect Summary tab can be customized so that you can display additional Jira defect fields as columns.
For advanced reporting, use qTest Insights to gain more defect visibility.