Start available Scenarios
The Available Scenarios tab displays all available Scenarios of the OSV Environment you are connected to.
You can use the Available Scenarios tab to start an OSV Scenario or trigger an individual message from a Scenario.
To open the Available Scenarios tab, click the ![]() Available icon in the Home menu.
Available icon in the Home menu.
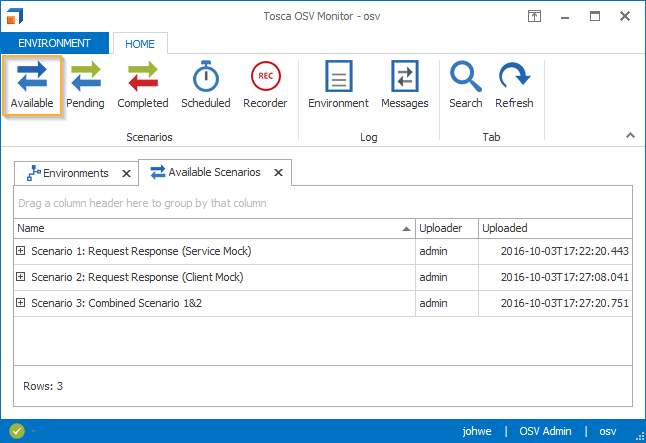
Available Scenarios tab
Start Scenarios
To start a Scenario, follow the steps below:
-
Right-click on a Scenario and select Start Scenario from the context menu.
The Start Scenario dialog opens.
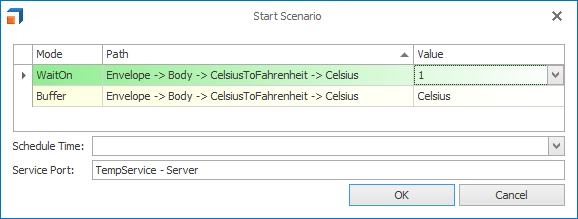
Start Scenario dialog
-
Optionally, enter values for the message elements that you set to WaitOn, Buffer, or Insert. For more information on using values, see chapter "Edit values".
-
To start the Scenario immediately, leave the Schedule Time field empty.
To set a start time, enter date and time in the format dd.MM.yyyy HH:mm:ss or click the
 arrow icon and select from the calendar.
 -
Enter the name of your service port into the Service Port field.
-
Click OK.
OSV starts the Scenario. When the Scenario is complete, you can view in the Completed Scenarios tab. Not yet completed Scenarios appear in the Pending Scenarios tab.
Trigger individual messages
To trigger individual messages, follow the steps below:
-
Click the + icon next to a Scenario, to display the Scenario's messages.
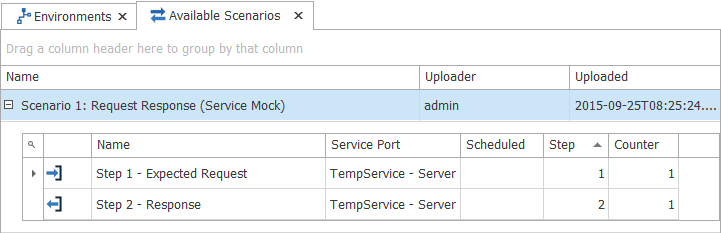
List of messages
-
Right-click a message and select Trigger Message from the context menu.
The Trigger Message dialog opens.

Trigger Message dialog
-
Optionally, enter values for the message elements that you set to WaitOn, Buffer, or Insert. For more information on using values, see chapter "Edit values".
-
To trigger the message immediately, leave the Schedule Time field empty.
To set a start time, enter date and time in the format dd.MM.yyyy HH:mm:ss or click the
arrow icon and select from the calendar. -
Enter the name of your service port into the Service Port field.
-
Click OK.
OSV triggers the message. You can view the sent message in the Messages Log. If you specified a scheduled time, you can view the message in the Scheduled Messages tab.