TestPad
The TestPad is an execution notepad feature in qTest Manager that houses all of your Test Run details and results. Using the TestPad, you can:
-
Edit Test Case descriptions and preconditions
-
Add, view, and remove attachments
-
Edit Test Step descriptions, expected results, and actual results
-
Add, reorder, and remove Test Steps
-
Add notes
-
Record time tracking
Access the TestPad
To access the TestPad:
-
Select a test object in the tree panel of the Test Execution tab, such as a Release, a Test Cycle, or a Test Suite.
-
On the Statistics tab of the corresponding object screen, select the check boxes for the Test Runs that you want to execute.
-
Click Run.
If the most recent version of a selected Test Case has not been approved, the Execute Approved Test Case modal appears. Proceed to step 4.
If the most recent versions of all selected Test Cases have been approved, the TestPad appears, based on the default execution mode. For information about each execution mode and about changing the default execution mode, refer to Change the default execution mode for the TestPad.
-
On the Execute Approved Test Case modal, select the option button for the most recent version of each Test Case listed.
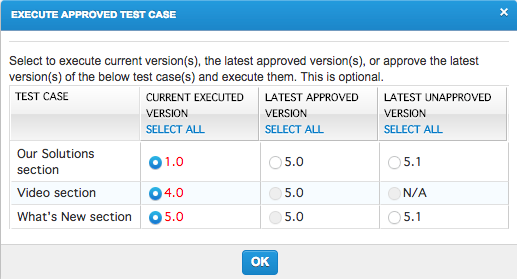 You must have the appropriate permissions to approve Test Cases. If you do not have the correct permissions, you can only execute the most recently approved version, which may be outdated.
 -
Click OK.
The TestPad appears, based on the default execution mode.
Change the default execution mode for the TestPad
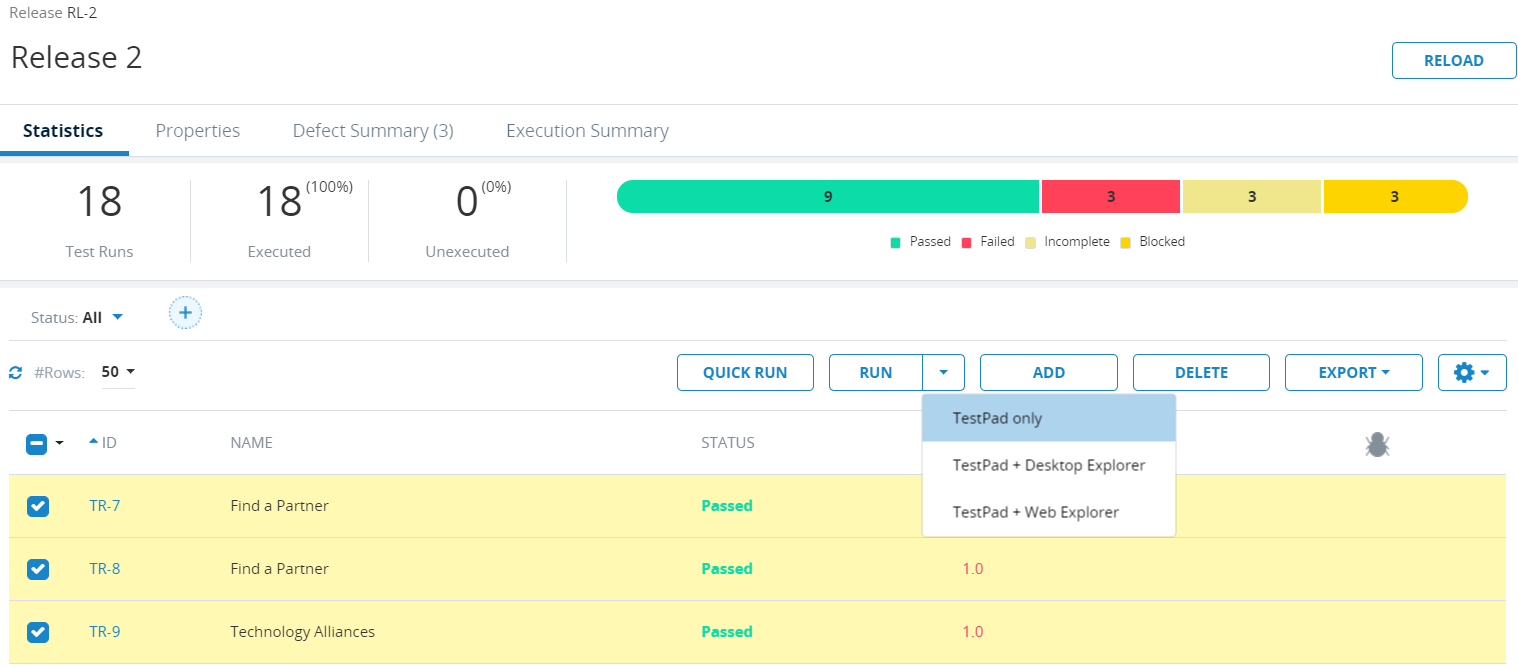
You can execute Test Runs using one of three execution modes: using only the TestPad, using the TestPad and Desktop Explorer, or using the TestPad and Web Explorer. When you click the Run button on a test object screen to execute Test Runs, the TestPad only mode is selected by default. However, the default execution mode can be changed.
To change the default execution mode:
-
Click the arrow on the Run button. The following options appear in a drop-down menu.
-
TestPad only. Execute the selected Test Runs using only the TestPad.
-
TestPad + Desktop Explorer. Execute the selected Test Runs using the TestPad and Desktop Explorer.
-
TestPad + Web Explorer. Execute the selected Test Runs using the TestPad and Web Explorer.
-
-
Select the execution mode to set as the default option.
Once you select a different execution mode, the default option is updated so that the selected mode applies the next time you click the Run button.
Navigate the TestPad
The TestPad is divided into the TestPad header and the following tabs.
TestPad header
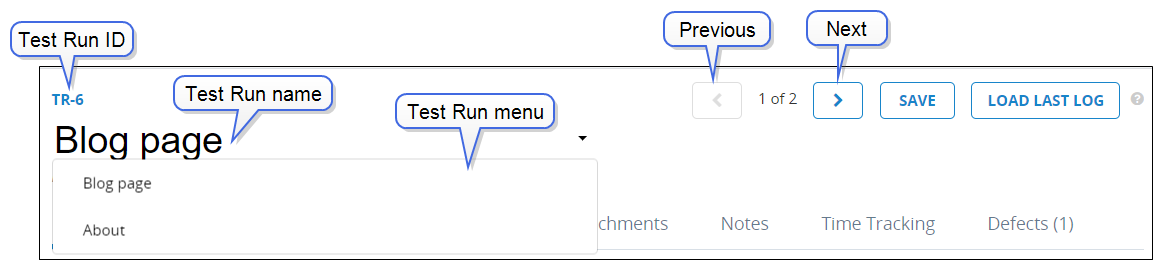
The TestPad header includes the following fields and options.
| Item | Description |
|---|---|
| Test Run ID | The ID of the currently displayed Test Run |
| Test Run name | The name of the currently displayed Test Run |
| Test Run menu | Click the arrow to the right of the Test Run name to display a drop-down list of the Test Runs that you selected on the test object screen, if you selected multiple Test Runs. Select a Test Run in the list to display the Test Run on the TestPad. |
| Time stamp | The date and time that the Test Run was last updated and the user who made the most recent update |
| Previous and Next buttons |
Click the Previous button to display the previous Test Run in the list. Click the Next button to display the next Test Run in the list. |
| Save |
Click Save to save any changes or work completed on the TestPad. For additional information about saving work on the TestPad, refer to Save work on the TestPad. |
| Load Last Log |
Click Load Last Log to view the most recent execution result of the currently displayed Test Run. Viewing the last log of a Test Run can be helpful for identifying any Test Steps that previously failed, allowing you to determine whether some steps may need more attention during the current execution. |
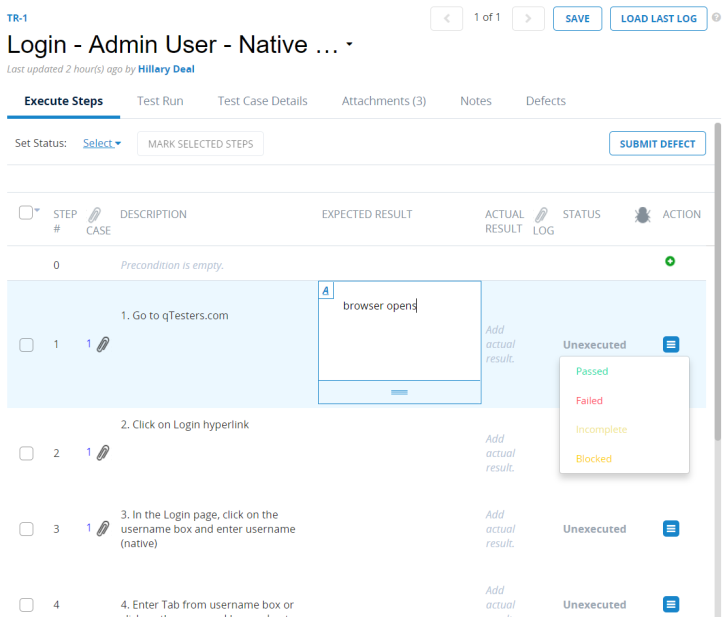
Execute Steps tab
The Execute Steps tab displays information about the Test Case. On this tab, you can record results, statuses, and defects for Test Steps.
The Execute Test Steps tab includes the following fields and options.
| Item | Description |
|---|---|
| Set Status | Click the status in this field to display a drop-down list of statues. Select a status, such as Passed, Failed, or Incomplete, to set the status of the Test Log. |
| Mark Selected Steps | Select the check boxes for multiple Test Steps, select a status in the Set Status field, and then click Mark Selected Steps to set the same status for all selected Test Steps. |
| Submit Defect |
Click Submit Defect to submit a Defect for the Test Log. The number of submitted Defects displays in parentheses on the button. For additional information about submitting Defects using the TestPad, refer to Submit Defects in Test Execution. |
| Check box |
Select the Test Run. You can select multiple Test Runs at a time. |
| Step # |
The Test Step number. Preconditions are listed as step 0. |
|
Hover your cursor in the Case column to display a paper clip icon Once an attachment is uploaded, a paperclip icon and the number of attachments displays in the Case column. Adding an attachment to a Test Case creates a new version of the Test Case.
|
|
| Description |
The Test Case description Click the Rich Text Editor icon |
| Expected Result |
The result expected when the Test Step is executed Click the Rich Text Editor icon |
| Actual Result |
The result that actually happened when the Test Step was executed Click the Rich Text Editor icon Entering the actual result for a Test Step is optional. For example, you may decide to only enter an actual result if the actual result differs from the expected result or if a failed Test Step does not provide details on why the Test Step failed. |
|
Hover your cursor in the Log column to display a paper clip icon Once an attachment is uploaded, a paperclip icon and the number of attachments displays in the Log column. |
|
| Status | Hover your cursor over the Test Step status to display a drop-down list of statuses. Select a status in the list to update the Test Step with the selected status. |
|
Hover your cursor in the Defects column to display the Add Defect icon For additional information about submitting Defects using the TestPad, refer to Submit Defects in Test Execution. |
|
| Action |
Click the Action icon
|
Test Run tab
The Test Run tab allows you to view and modify Test Run properties, such as the execution type, the priority, and the planned start and end dates. Changes made on this tab will save to the latest version of the Test Run properties and the executed Test Log.
Test Case Details tab
The Test Case Details tab is read-only and displays details that were entered for the Test Case on the Test Design tab.
Attachments tab
The Attachments tab allows you to view and add new attachments, such as screenshots, for a Test Case or a Test Log. Attachments added to a Test Case during test execution also display on this tab. Click an existing attachment to display a preview of the attachment.
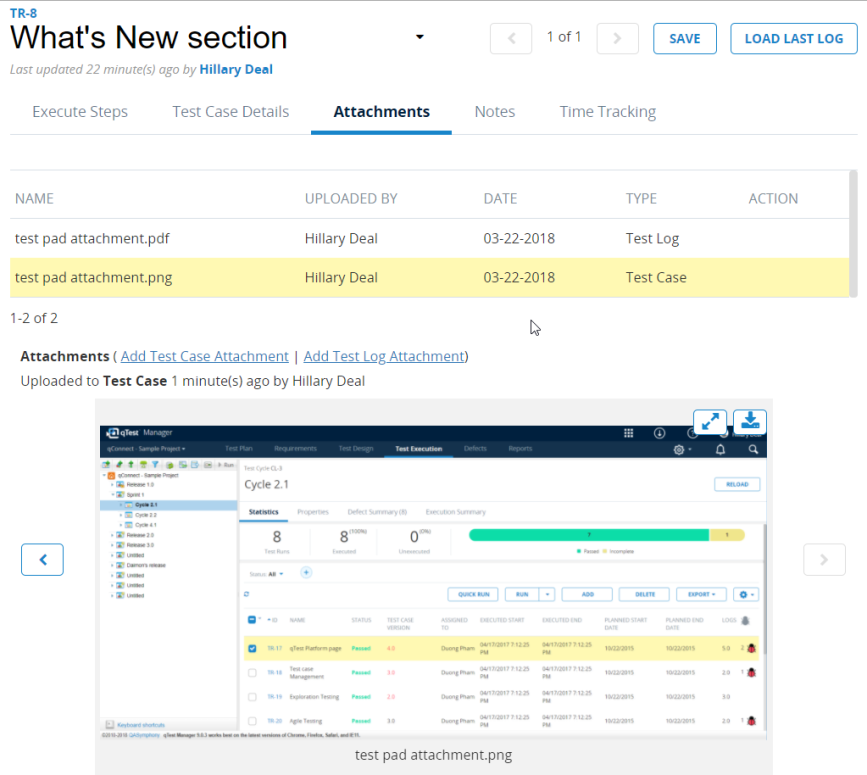
The Attachments tab includes the following fields and options.
| Item | Description |
|---|---|
| Name | The name of the attachment file |
| Uploaded by | The user who uploaded the attachment |
| Date | The date that the attachment was uploaded |
| Type | The type of the attachment, such as Test Case or Test Log |
| Action | Hover your cursor in the Action column to display the Delete icon |
| Add Test Case Attachment | Click the Add Test Case Attachment link to display options for uploading an attachment for the Test Case. You can upload a file from your computer, take and paste a screenshot, or drag and drop a file. |
| Add Test Log Attachment | Click the Add Test Log Attachment link to display options for uploading an attachment for the Test Case. You can upload a file from your computer, take and paste a screenshot, or drag and drop a file. |
Notes tab
The Notes tab displays a rich text editor field to allow you to document information regarding the Test Run. Notes entered here are viewable in the Test Log Details section of the Execution History tab on the Test Run screen. The notes also display with a time stamp indicating the user who added the note and the date and time that the note was added.
Time Tracking tab
The Time Tracking tab allows you to manually enter the planned time and the actual time spent executing the Test Run. When you click Save on the TestPad, the Execution Time dialog appears with an automatically calculated execution time based on your start and end time. However, you can manually override these values on this dialog or on the Time Tracking tab. For more information about entering time on the Execution Time dialog while saving your work, refer to Save work on the TestPad.
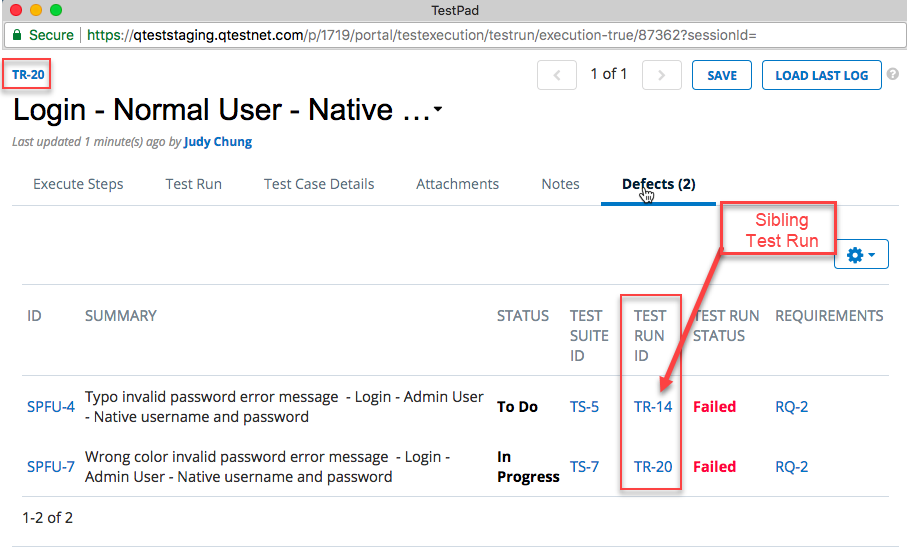
Defects tab
The Defects tab displays all Defects linked to previous Test Logs or Test Logs of "sibling" Test Runs. Sibling Test Runs are the other Test Runs in the same Test Case.
The columns that display on the Defects tab are configurable. Click the Gear icon ![]() to display a list of columns. Select the check box for a column to display the column on the Defects tab. Clear the check box for a column to hide the column from displaying on the Defects tab.
to display a list of columns. Select the check box for a column to display the column on the Defects tab. Clear the check box for a column to hide the column from displaying on the Defects tab.
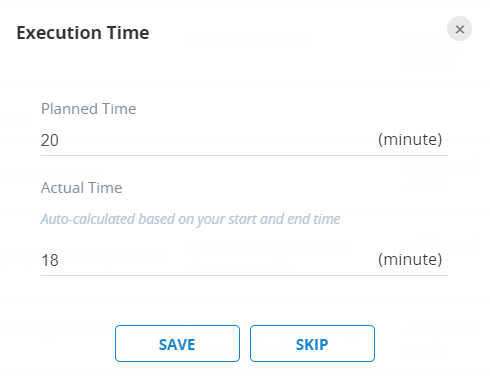
Save work on the TestPad
Once you have finished your execution, click Save to save your work on the TestPad. The Execution Time dialog appears with an automatically calculated execution time based on your start and end time. However, you can manually override the calculated times.
To manually override the calculated times:
-
In the Planned Time field, enter the number of minutes that you had expected the execution to last.
-
In the Actual Time field, enter the number of minutes that the execution actually lasted for.
-
Click Save.
When you close the TestPad, the Execution History section on the Test Run screen is automatically updated with the details of this execution, including the actual results and the statuses for each Test Step.