Execute Test Runs with the TestPad and Desktop Explorer
Test Runs can be executed using Desktop Explorer, which is a desktop application that records your activity to capture testing steps and evidence. Desktop Explorer can only be installed on Microsoft Windows. If you prefer to record testing sessions using a web browser plug-in, you can also use the TestPad with Web Explorer.
Prerequisites
- Download and install the Desktop Explorer application from the Desktop Explorer Download Center.
Execute Test Runs with the TestPad and Desktop Explorer
-
Click the Test Execution tab.
-
In the tree panel, select the object that contains the Test Runs that you want to execute, such as a Release or a Test Cycle.
The object screen appears.
-
Click the Statistics tab to view a grid of all Test Runs contained in the object.
-
Select the check boxes for the Test Runs that you want to execute.
-
Click the arrow on the Run button. Then select TestPad + Desktop Explorer.
If the most recent version of a selected Test Case has not been approved, the Execute Approved Test Case modal appears. Proceed to step 6.
If the most recent versions of all selected Test Cases have been approved, the TestPad and a message requesting access to Desktop Explorer appear. Proceed to step 8.
Make sure the application under test is open in the same browser as qTest Manager and that pop-up windows are allowed for that browser. -
On the Execute Approved Test Case modal, select the option button for the most recent version of each Test Case listed.
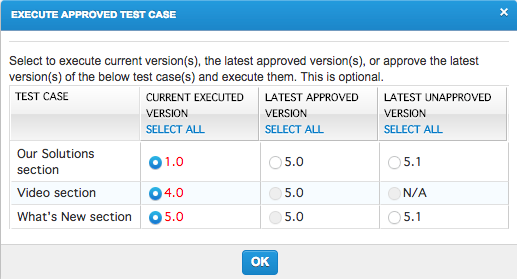 You must have the appropriate permissions to approve Test Cases. If you do not have the correct permissions, you can only execute the most recently approved version, which may be outdated.
 -
Click OK.
The TestPad and a message requesting access to Desktop Explorer appear.
-
On the message requesting access to Desktop Explorer, click the appropriate option to allow Desktop Explorer to open.
The Desktop Explorer dialog appears.
-
Start the testing session using the Desktop Explorer dialog.
For more information on using Desktop Explorer to record a testing session, refer to Desktop Explorer Quick Start Guide.
-
Once you have finished testing, stop the testing session.
Desktop Explorer appears in Editor mode, where you can edit and review all data recorded in the testing session. For more information on editing recorded testing sessions, refer to Edit a Recorded Desktop Explorer Session.
-
On the TestPad, enter relevant information for your testing session, such as whether the Test Runs passed or failed.
-
Click Save to complete the test execution.
For more information on saving using the TestPad, refer to Save work on the TestPad.
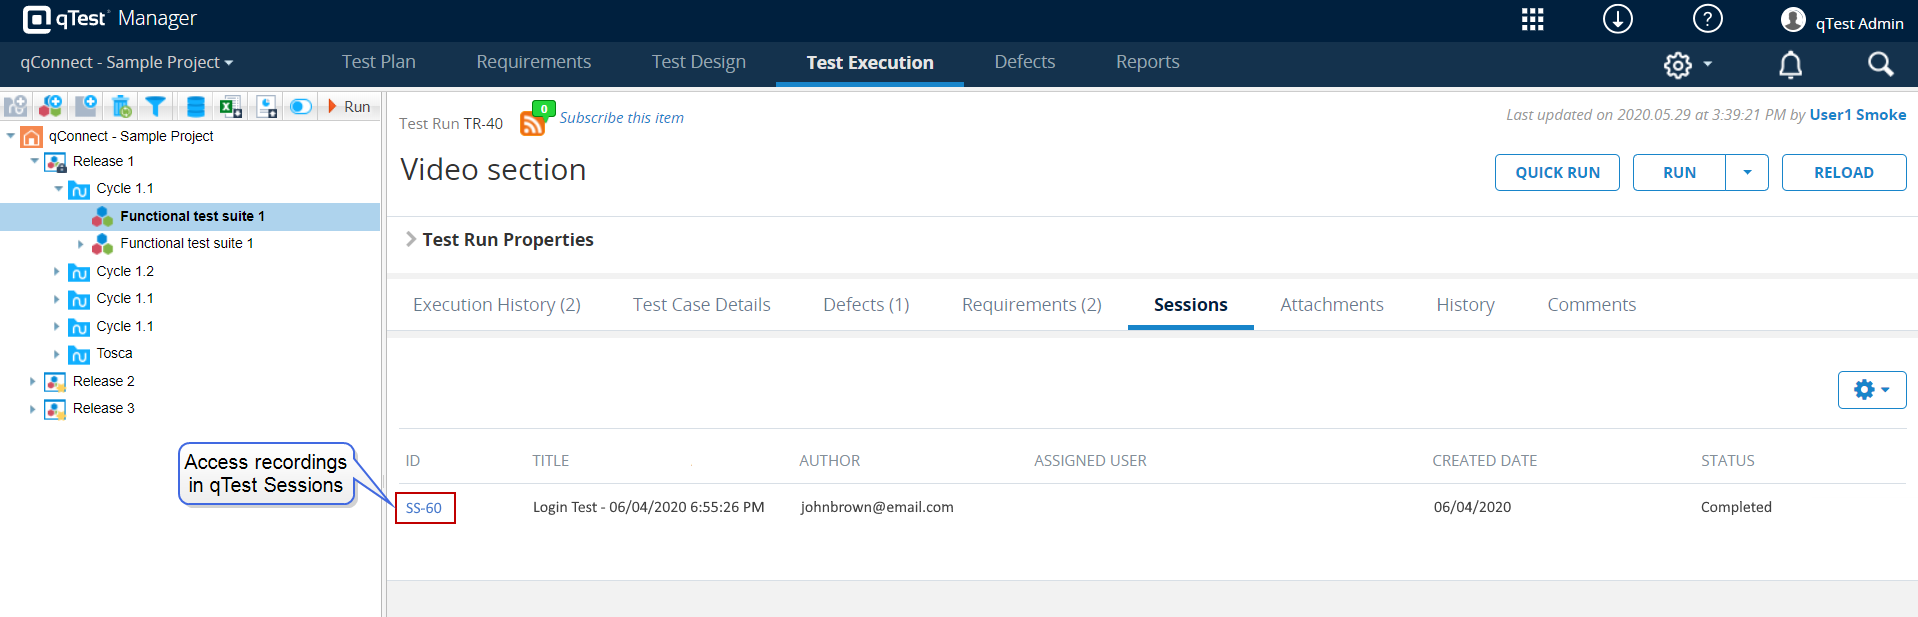
View Desktop Explorer recordings
Once you have recorded a testing session using Desktop Explorer, you can view the recording for a Test Run using either the desktop application or a web browser.
-
Desktop application. Once you stop a testing session, Desktop Explorer appears in Editor mode, where you can edit and review all data recorded in the testing session.
-
Web browser. Access the Sessions tab on the Test Run screen. Click the link in the ID column to access qTest Sessions, where you can view the recording and screenshots.